Doggy Scout

Homemade Banana Dog Treats: Easy Healthy Recipe in Minutes
Homemade Banana Dog Treats

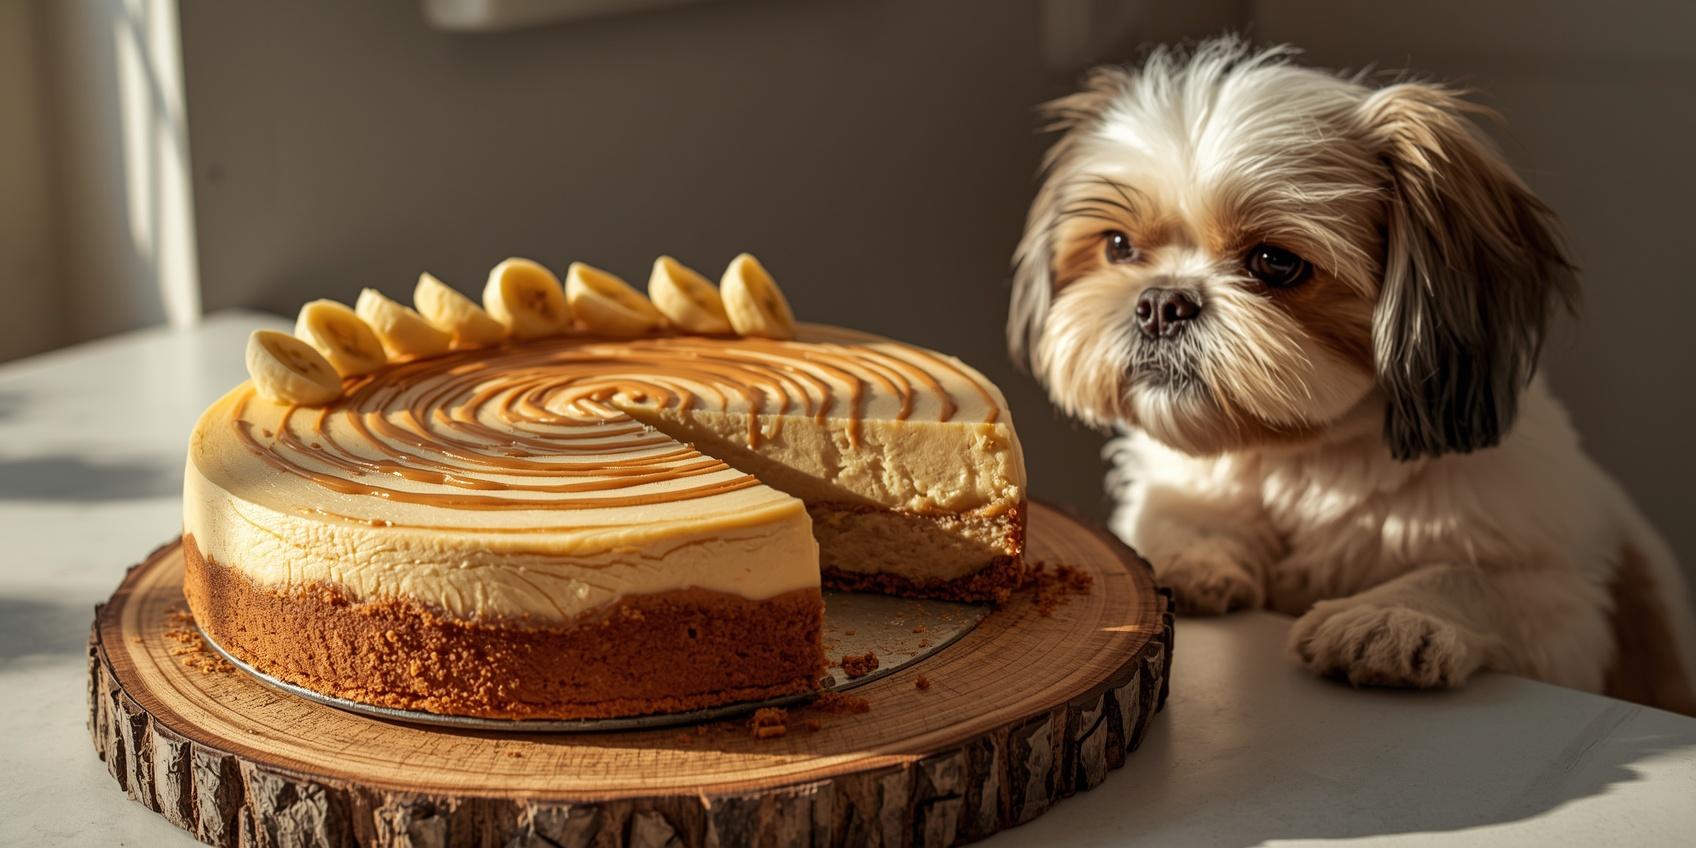
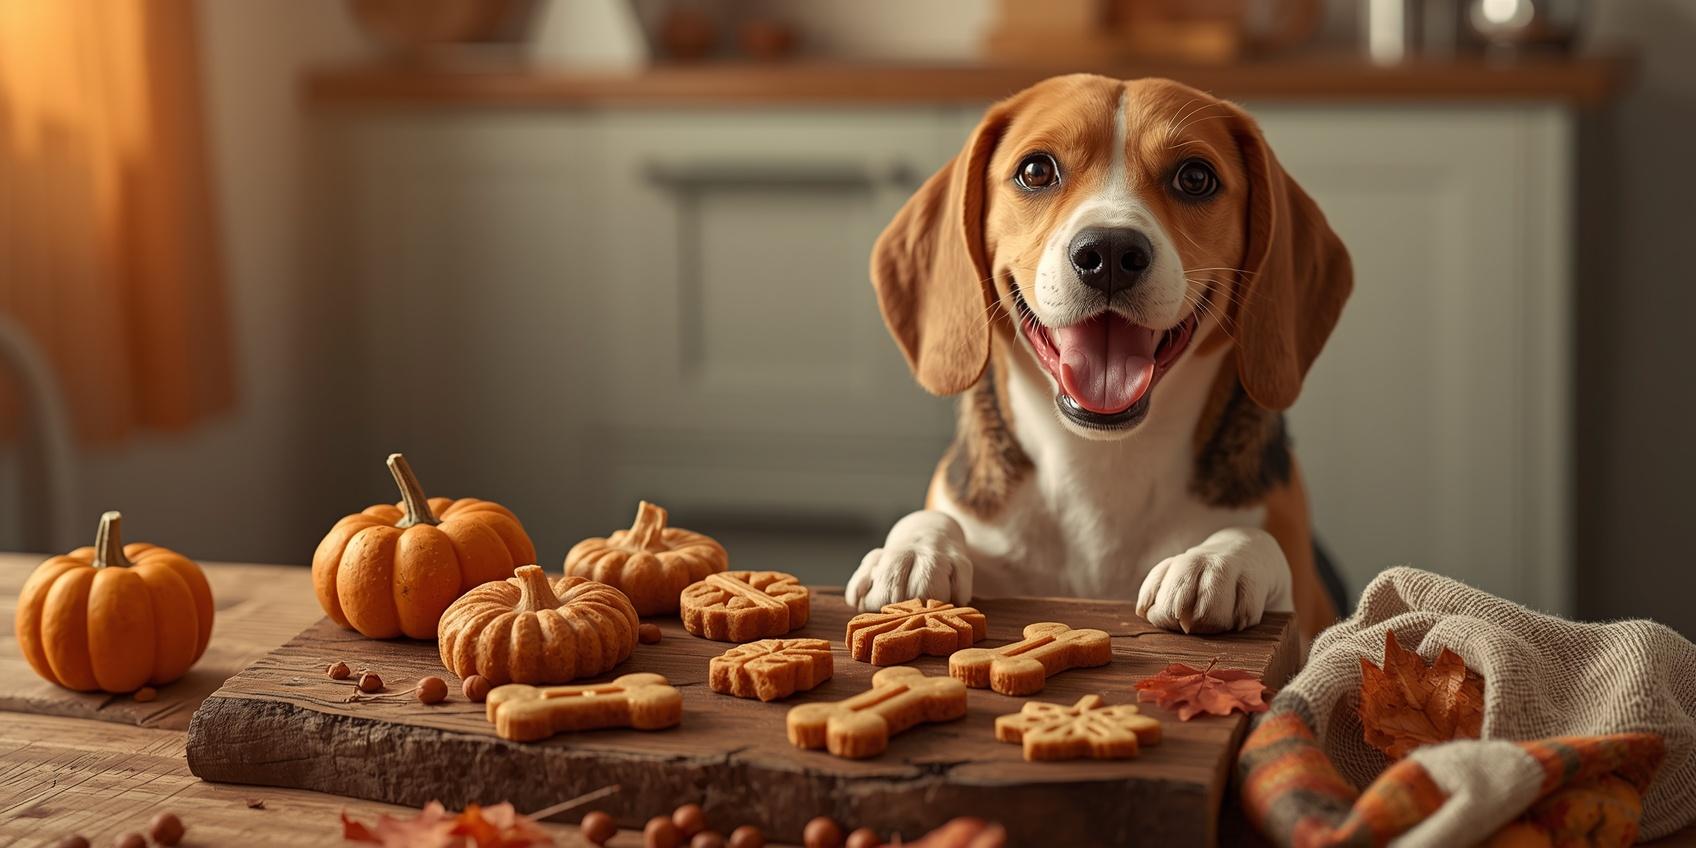
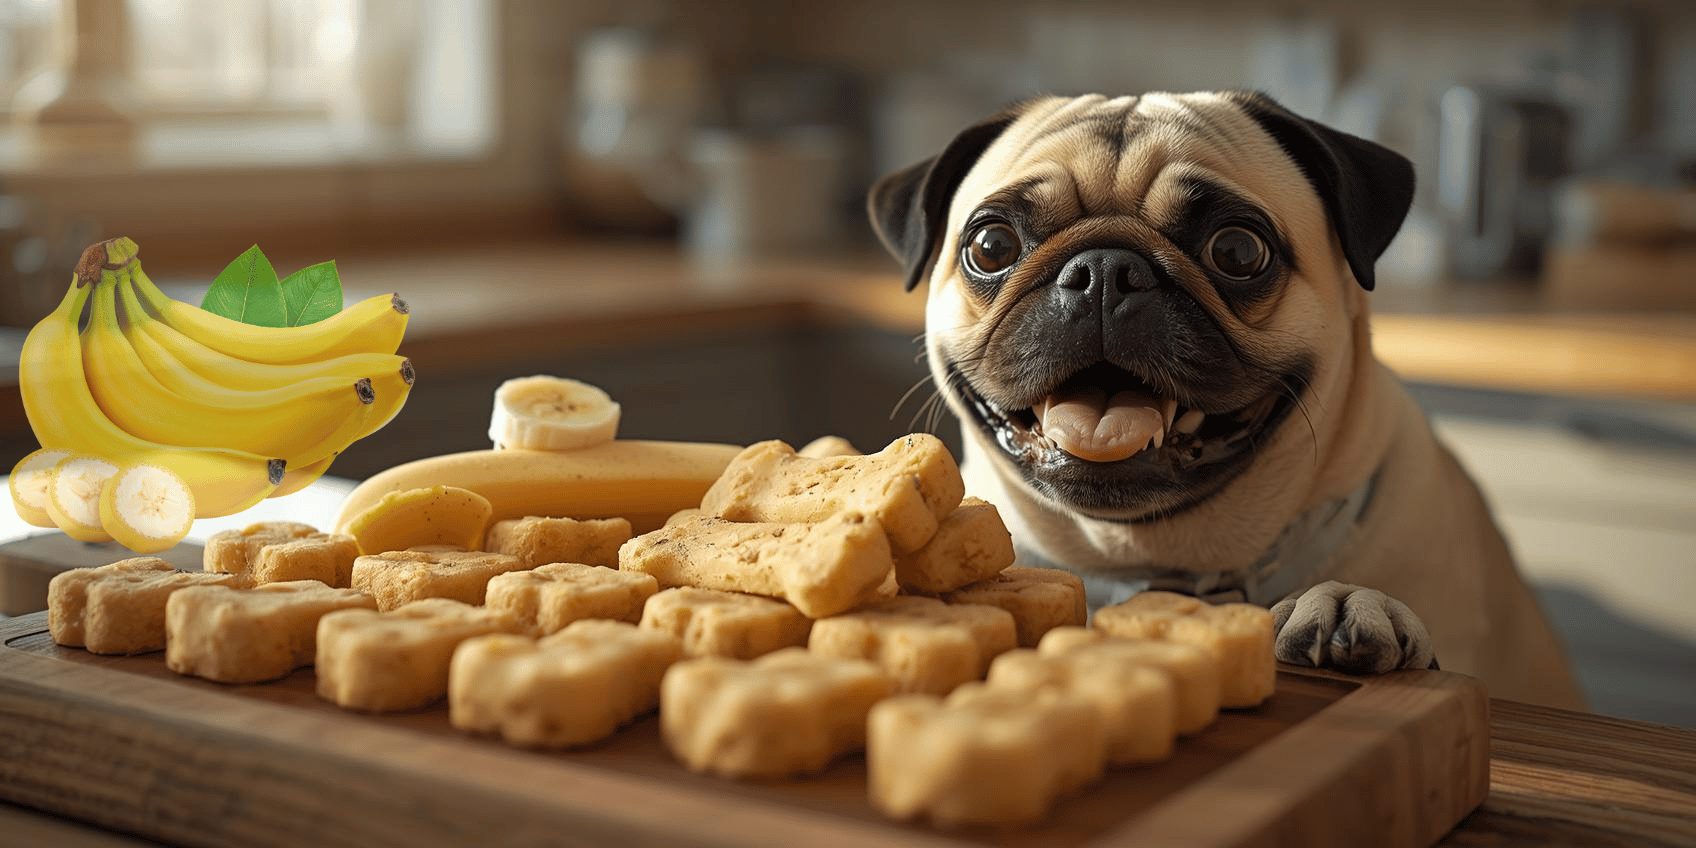
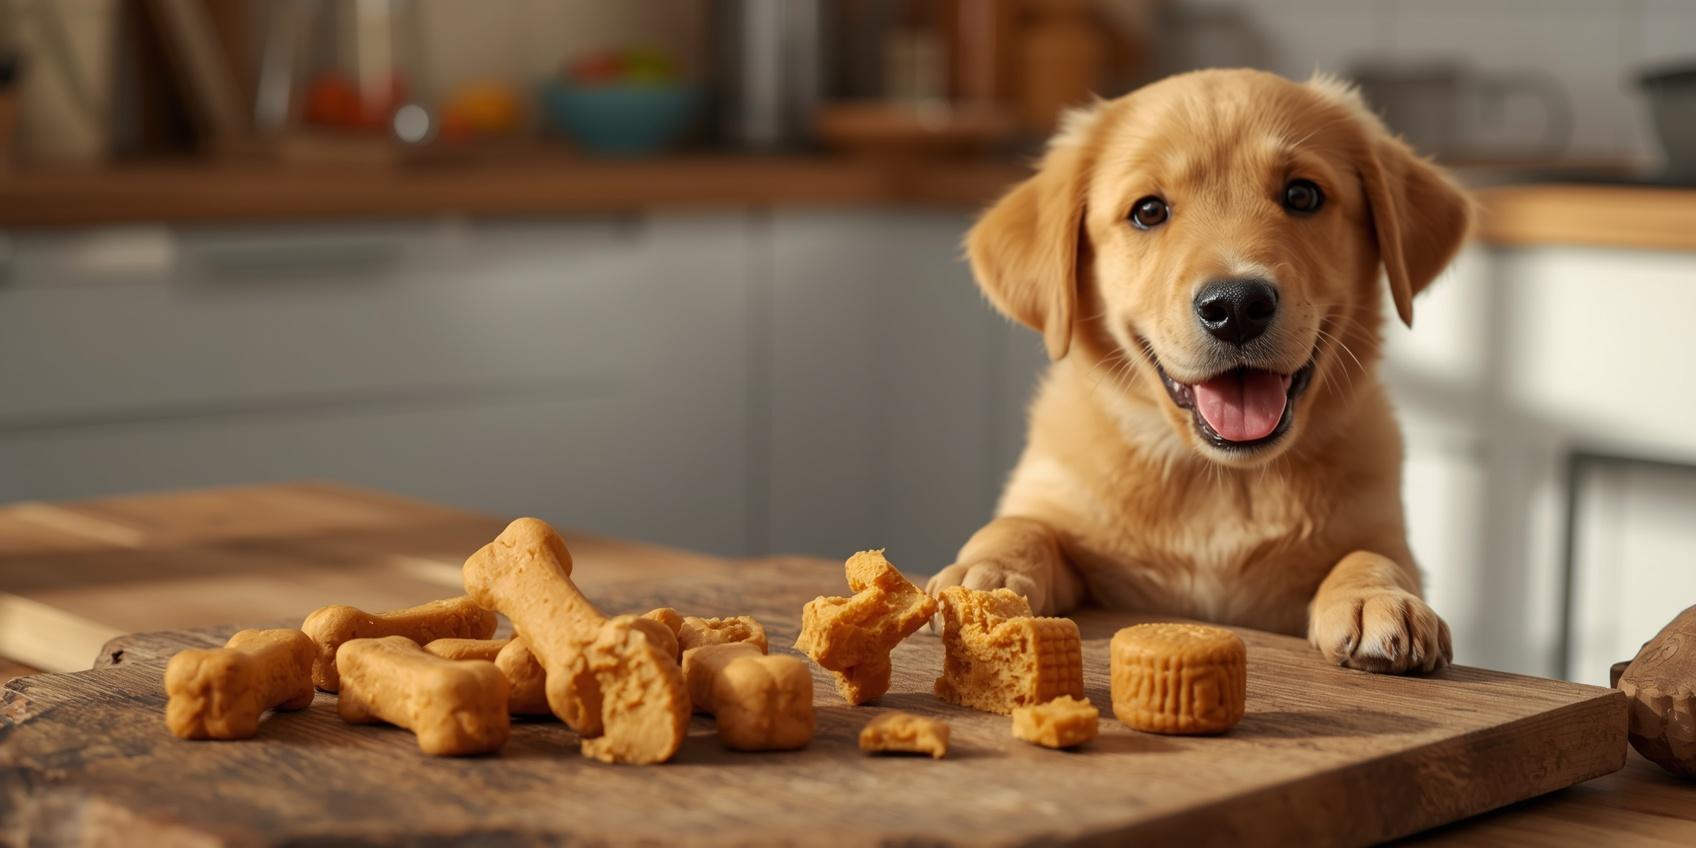
If you love spoiling your furry friend, homemade banana dog treats are a simple and healthy way to do it. You want to give your dog something tasty, safe, and nutritious, right? These treats use natural ingredients you probably already have at home. Plus, making them yourself means you control exactly what goes into your dog’s snacks—no hidden sugars or preservatives. Keep reading, and you’ll discover how easy it is to whip up these delicious treats that your dog will love, while feeling good about what you’re feeding them. Benefits Of Homemade Dog Treats Homemade dog treats offer many advantages for your furry friend. You control the ingredients and avoid harmful additives. This helps keep your dog healthy and happy. Making treats at home also allows customization. You can cater to your dog’s taste and dietary needs easily. This personal touch makes treats more special and safe. Better Ingredient Control You know exactly what goes into the treats. No artificial colors, flavors, or preservatives. This reduces the risk of allergies and stomach problems. Cost-effective And Convenient Homemade treats cost less than store-bought options. You can make large batches and store them. This saves money and time over repeated purchases. Healthier Options Use fresh fruits, vegetables, and whole grains. These ingredients add vitamins and fiber to your dog’s diet. Healthier treats support better digestion and energy. Strengthens Bond With Your Dog Making treats together creates a fun routine. Your dog feels loved and cared for. This deepens trust and happiness between you both. Credit: eatthegains.com Choosing The Right Ingredients Choosing the right ingredients for homemade banana dog treats is very important. Good ingredients keep your dog healthy and happy. Fresh, natural foods make treats tasty and safe. Avoid anything that might upset your dog’s stomach or cause allergies. Pick ingredients that give good nutrition and support your dog’s energy. Simple, clean ingredients work best for homemade snacks. Think about your dog’s size, age, and health when choosing what to use. Safe Fruits And Vegetables Bananas are a great base for dog treats. They are soft and full of vitamins. Other safe fruits include blueberries, apples, and pears. Remove seeds and cores before use. Carrots, sweet potatoes, and green beans are good vegetables. They add crunch and nutrients. Avoid onions, garlic, and grapes. These can harm your dog. Avoiding Harmful Additives Stay away from artificial colors and flavors. These can cause allergies or stomach upset. Skip sugar, salt, and preservatives. Dogs do not need these extras. Use natural sweeteners like honey in small amounts. Avoid anything with xylitol or chocolate. These are toxic to dogs and dangerous. Nutritional Boosters Add a little peanut butter for protein and taste. Make sure it does not contain xylitol. Plain yogurt can help with digestion. Ground flaxseed or chia seeds add healthy fats. Use pumpkin puree for fiber and vitamins. These boosters make treats more nutritious and tasty. Simple Banana Dog Treat Recipes Simple banana dog treat recipes use few ingredients. They are easy to make at home. These treats keep dogs happy and healthy. Bananas add natural sweetness and nutrients dogs love. Try these recipes to give your dog tasty snacks. Each one is quick and safe for dogs. No need for special tools or hard-to-find items. Basic Banana Biscuits Mix one ripe banana with one cup of flour. Add one egg and a tablespoon of water. Stir until dough forms. Roll out dough and cut into shapes. Bake at 350°F for 15 minutes. Cool before serving to your dog. Peanut Butter Banana Bites Combine half a banana with two tablespoons of peanut butter. Add one cup of oats and mix well. Shape into small balls or patties. Place on a baking sheet. Bake at 325°F for 10-12 minutes. Let cool before giving to your dog. Oatmeal Banana Cookies Mash one banana and mix with one cup of oats. Add a teaspoon of honey for sweetness. Form small cookie shapes on a tray. Bake at 350°F for 12 minutes. Allow to cool fully before serving. Credit: www.pookspantry.com Step-by-step Baking Tips Baking homemade banana dog treats is fun and rewarding. Follow these simple steps to make perfect treats. Each step helps ensure your dog gets a tasty and safe snack. Pay close attention to details for the best results. Mixing And Preparing Dough Start by mashing ripe bananas until smooth. Use a bowl to combine bananas with flour and an egg. Stir gently until the dough forms a soft ball. Avoid overmixing to keep the dough light. If too sticky, add a little more flour. Let the dough rest for 5 minutes before shaping. Shaping Treats Lightly flour your work surface to prevent sticking. Roll the dough to about 1/4 inch thick. Use cookie cutters or a knife to cut shapes. Choose small pieces for easy chewing. Place the shapes evenly on a baking sheet. Leave space between treats for even cooking. Baking Times And Temperatures Preheat your oven to 350°F (175°C). Bake treats for 15 to 20 minutes. Watch the edges for a light golden color. Remove treats when firm but not too hard. Let them cool completely before serving. Store in an airtight container for freshness. Storage And Shelf Life Homemade banana dog treats are a tasty and healthy snack for your pet. Storing them right keeps them fresh and safe to eat. Knowing how to store and how long they last helps you avoid waste. This guide shares simple tips for storing your treats well. Proper Storage Methods Store treats in an airtight container. Keep them in a cool, dry place. Avoid direct sunlight and heat. This stops moisture and mold from forming. Use containers made of glass or plastic with tight lids. Paper bags or open bowls let air in. They make treats go stale faster. Freezing Treats Freeze extra treats to keep them longer. Place treats in a freezer-safe bag or container. Remove as much air as possible before sealing. Label the bag with the date. Frozen treats can last … Read more
DIY Dog Breath Mints: Easy Homemade Recipe for Fresh Breath

DIY Dog Breath Mints

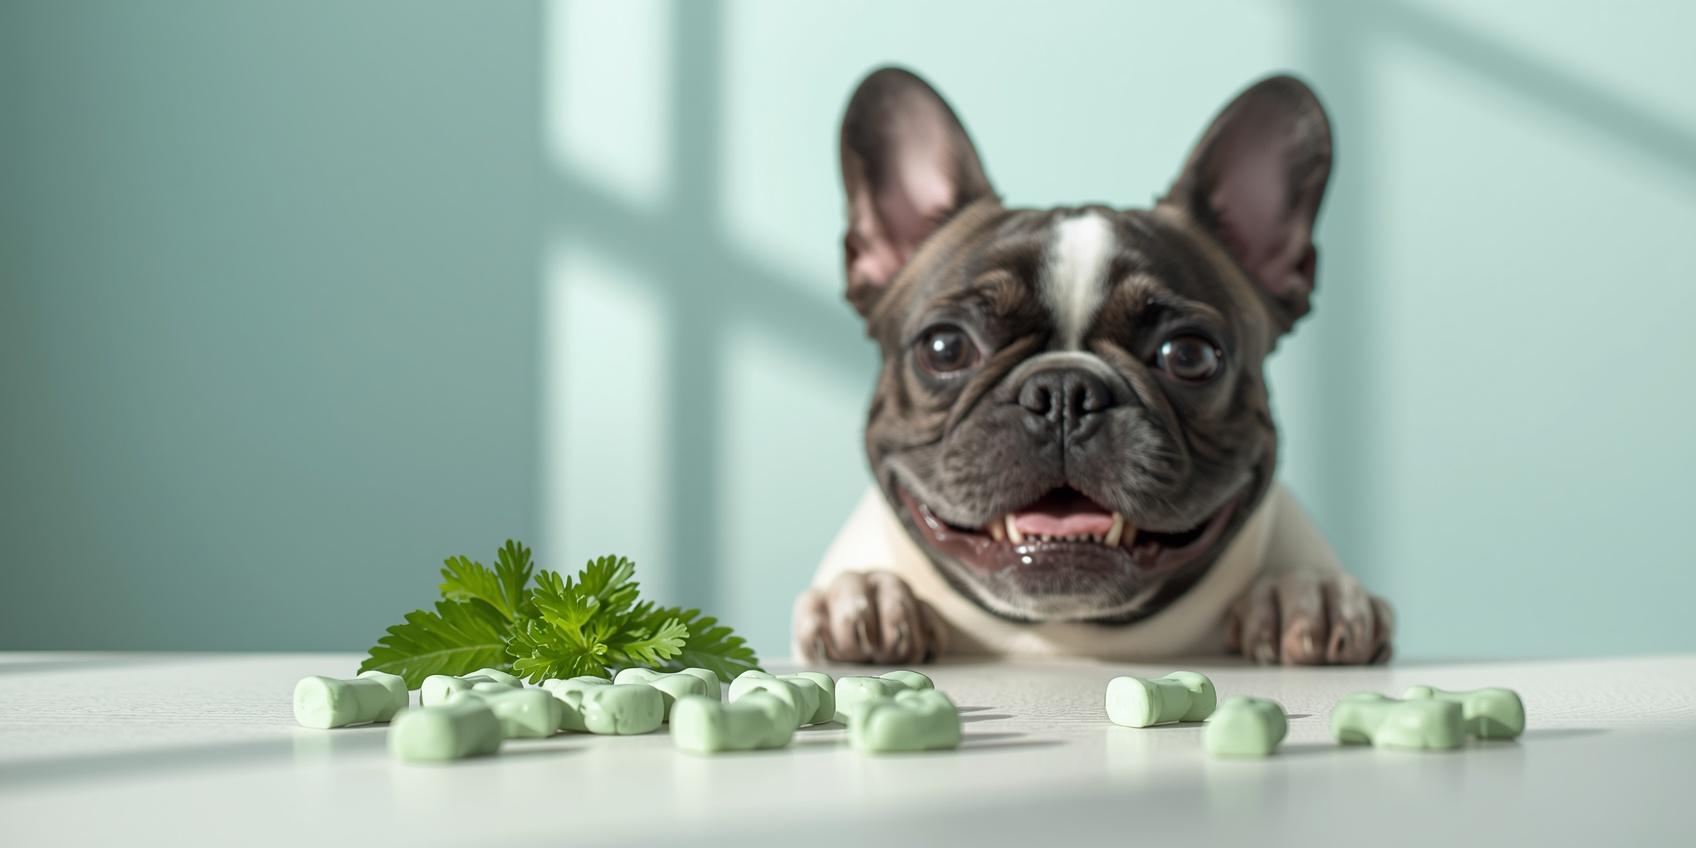
Does your dog’s breath make you hesitate before giving them a big, loving hug? You’re not alone. Bad breath in dogs can be a real challenge, but what if you could fix it easily and naturally at home? DIY dog breath mints are a simple, safe way to keep your furry friend’s mouth fresh and clean. You’ll discover easy recipes and tips that will make your dog’s breath smell great—and strengthen the bond between you and your pet. Ready to learn how to make your own dog breath mints? Let’s dive in! Credit: liliesloveandluna.com Benefits Of Freshening Dog Breath Freshening your dog’s breath is more than just a way to stop bad smells. It helps keep your dog’s mouth healthy. Clean breath shows good dental care and helps avoid problems like gum disease. Fresh breath also makes spending time with your dog more pleasant. Here are some benefits of freshening your dog’s breath with DIY mints. Improves Oral Health Bad breath often means bacteria build up in the mouth. These bacteria cause plaque and tartar on teeth. DIY dog breath mints help reduce bacteria. This lowers the risk of tooth decay and gum infections. Healthy teeth and gums make your dog feel better. Prevents Serious Health Issues Bacteria from the mouth can enter the bloodstream. This can cause problems in the heart, liver, and kidneys. Freshening breath controls bacteria levels. It helps keep your dog’s whole body healthier. Small steps like mints can protect your dog’s life. Enhances Bonding Time Fresh breath makes close contact more enjoyable. You can cuddle, kiss, or play without worrying about bad smells. DIY mints create a positive experience for you and your dog. This strengthens your bond and trust. Cost-effective And Safe Homemade dog breath mints use simple, natural ingredients. They cost less than many store products. You control what goes into the mints. This reduces the chance of harmful chemicals or allergens. Safe, affordable care helps your dog every day. Common Causes Of Bad Breath In Dogs Bad breath in dogs can be unpleasant and worrying. It often signals an underlying problem. Knowing common causes helps you address the issue quickly. Some reasons for bad breath are simple to fix. Others need a vet’s care. Understanding these causes is the first step to fresher dog breath. Dental Disease Dental disease is the top cause of bad breath in dogs. Plaque and tartar build up on teeth. This causes bacteria to grow and smell. Gum infections and tooth decay make breath worse. Poor Oral Hygiene Dogs need regular teeth cleaning. Without brushing, food particles stay in the mouth. Bacteria multiply and cause bad odors. Many dogs do not get enough dental care at home. Diet And Eating Habits What dogs eat affects their breath. Strong-smelling foods can cause bad odors. Eating trash or spoiled food makes breath smell bad. Some dogs chew on smelly objects too. Health Problems Some illnesses cause bad breath in dogs. Kidney disease, diabetes, and liver problems can change breath smell. These need prompt medical attention. Bad breath may be an early warning sign. Oral Infections Or Injuries Infections in the mouth cause bad breath. Cuts, sores, or foreign objects in the mouth can smell bad. These issues may also cause pain or swelling. Safe Ingredients For Dog Breath Mints Choosing safe ingredients is key for making dog breath mints at home. Dogs have sensitive stomachs and different needs than humans. Using natural, gentle ingredients helps keep your pet healthy and happy. Many common foods can harm dogs. Avoid artificial sweeteners, salt, or spices. Instead, focus on fresh herbs and natural flavors that freshen breath without risk. Parsley For Fresh Breath Parsley is a top choice for dog mints. It fights bad breath and supports digestion. This herb is safe and easy to add in small amounts. Coconut Oil For Antibacterial Benefits Coconut oil helps kill bacteria in the mouth. It also soothes gums and tastes mild. Use organic, virgin coconut oil for best results. Peppermint For A Cool Taste Peppermint leaves can freshen breath naturally. Use a tiny bit, as strong oils may upset your dog’s stomach. Fresh or dried leaves work well. Carrots For Crunch And Clean Teeth Carrots add crunch and help clean teeth. They are low in calories and safe for dogs. Grate or finely chop carrots for your mints. Simple Recipes For Homemade Dog Breath Mints Making dog breath mints at home is easy and safe. These simple recipes use natural ingredients. They help freshen your dog’s breath without harsh chemicals. You can prepare them quickly with items from your kitchen. These homemade mints also support your dog’s oral health. They can reduce bad odors and keep your pet’s mouth clean. Try these simple recipes to keep your dog’s breath fresh and pleasant. Herbal Mint Mints Mix 1 cup whole wheat flour with 1/4 cup finely chopped fresh mint leaves. Add 1/4 cup water and 1 tablespoon olive oil. Stir until a dough forms. Roll out and cut into small shapes. Bake at 350°F for 15 minutes. Let cool before giving to your dog. Peanut Butter And Parsley Mints Combine 1/2 cup natural peanut butter and 1/4 cup chopped fresh parsley. Add 1 cup oat flour and 1/4 cup water. Mix into a smooth dough. Shape into small balls or biscuits. Bake at 325°F for 12 minutes. Allow to cool fully before serving. Coconut Oil And Baking Soda Mints Mix 1/4 cup coconut oil with 1 tablespoon baking soda. Add 1 cup rice flour and 2 tablespoons chopped fresh mint. Stir well to make dough. Form small mints and place on baking sheet. Bake at 300°F for 20 minutes. Cool completely before use. Step-by-step Mint Preparation Guide Making your own dog breath mints is simple and fun. These homemade mints help keep your dog’s breath fresh and clean. Follow this clear, step-by-step guide to prepare tasty and safe mints for your pet. Each step is easy to follow and uses common ingredients. Mixing Ingredients … Read more

Homemade Soft Dog Treats: Easy Recipes Your Pup Will Love

Homemade Soft Dog Treats

If you want to give your furry friend something special, homemade soft dog treats are the perfect choice. You know your dog deserves the best, and making treats at home lets you control every ingredient. Plus, soft treats are easy for dogs of all ages to chew and enjoy. Imagine seeing your dog’s tail wag with excitement every time you bring out a treat made just for them. Keep reading, and you’ll discover simple recipes and tips that make treat-making fun and rewarding for both you and your pup. Credit: www.pookspantry.com Benefits Of Homemade Treats Homemade soft dog treats offer many benefits for pet owners and their dogs. They allow control over ingredients and avoid harmful additives. Making treats at home ensures freshness and better nutrition. Dogs often enjoy the taste of homemade snacks more than store-bought ones. These treats also cater to specific dietary needs. Dogs with allergies or sensitivities benefit from tailored recipes. Homemade treats can be softer, making them easier for older dogs to chew. Preparing treats at home can save money over time and reduce packaging waste. Improved Ingredient Quality Homemade treats use fresh, natural ingredients. You can avoid artificial colors, flavors, and preservatives. This helps keep your dog healthier and happier. Choosing organic or locally sourced ingredients is easier too. Customizable For Your Dog’s Needs Recipes can match your dog’s health and taste preferences. Control the amount of protein, fats, and carbs. Avoid allergens like wheat, corn, or dairy. This helps dogs with food allergies or special diets. Stronger Bond With Your Dog Making treats shows love and care. Your dog appreciates the effort and attention. Sharing homemade treats builds trust and deepens your connection. It turns treat time into a special moment. Cost-effective And Eco-friendly Homemade treats cost less than store-bought ones. You can buy ingredients in bulk or use leftovers. This reduces waste and packaging trash. It is a budget-friendly choice for many pet owners. Essential Ingredients Creating homemade soft dog treats starts with choosing the right ingredients. These ingredients should be safe, tasty, and healthy for your dog. Good ingredients make treats enjoyable and good for your pet’s body. Knowing what to use and what to avoid helps you bake treats your dog will love. Safe Flavors For Dogs Dogs like simple, natural flavors. Peanut butter is a favorite, but it must not contain xylitol. Pumpkin adds moisture and taste. Sweet potatoes are mild and easy to digest. Plain yogurt gives a creamy texture and good probiotics. Avoid spices and artificial flavors that can upset your dog’s stomach. Nutritious Additions Choose ingredients that add vitamins and minerals. Oats provide fiber and energy. Carrots add crunch and beta-carotene. Eggs give protein and help bind ingredients. Blueberries offer antioxidants and a sweet taste. These additions improve health and keep treats soft and fresh. Avoiding Harmful Ingredients Some foods harm dogs even in small amounts. Never use chocolate, grapes, raisins, or onions. Avoid salt and sugar, which can cause health issues. Artificial sweeteners like xylitol are toxic. Stay clear of nuts like macadamia. Always check ingredient lists carefully before baking. Basic Soft Treat Recipes Making soft dog treats at home is simple and fun. These basic recipes use common ingredients. They keep your dog happy and healthy. You control what goes into every bite. Perfect for training or just a tasty snack. Each recipe here is soft and easy to chew. Your dog will love the flavors. Plus, these treats store well and stay fresh. Peanut Butter And Pumpkin Mix 1 cup of pumpkin puree with 1/2 cup natural peanut butter. Add 1 cup whole wheat flour. Stir until dough forms. Roll out and cut into small shapes. Bake at 350°F for 15 minutes. Let cool before serving. Pumpkin helps digestion. Peanut butter adds protein and taste. Chicken And Sweet Potato Cook 1 cup sweet potato until soft. Mix with 1 cup shredded cooked chicken. Add 1/2 cup oat flour. Combine well to form dough. Shape into small rounds. Bake at 325°F for 20 minutes. Cool completely. Sweet potato provides vitamins. Chicken is rich in protein. Oatmeal And Banana Mash 1 ripe banana in a bowl. Stir in 1 cup oats and 1 egg. Mix until thick dough forms. Spoon onto baking sheet in small piles. Bake at 350°F for 10 minutes. Allow to cool before giving to your dog. Banana adds natural sweetness. Oats are good for digestion. Step-by-step Preparation Making homemade soft dog treats is easier than you think. Follow these simple steps to prepare tasty and healthy snacks for your dog. The process is fun and rewarding. You will see how fresh ingredients turn into soft treats your dog will love. Mixing Ingredients Start by gathering all the ingredients. Use fresh and dog-safe items like oats, peanut butter, and pumpkin. Mix dry ingredients in one bowl. In another bowl, combine wet ingredients. Slowly add the wet mix to the dry. Stir until the dough forms. It should be soft but not sticky. Shaping Treats Lightly flour your work surface. Roll the dough to about half an inch thick. Use cookie cutters or a knife to cut shapes. You can make bones, circles, or squares. Place shapes on a baking sheet lined with parchment paper. Leave space between each treat for even baking. Baking Tips Preheat your oven to the right temperature, usually around 350°F (175°C). Bake treats for about 15 to 20 minutes. Check often to avoid overbaking. Soft treats should stay slightly moist inside. Let them cool completely before giving to your dog. Store treats in an airtight container to keep freshness. Storage And Shelf Life Storing homemade soft dog treats properly keeps them fresh and tasty for your pet. Good storage also stops the treats from going bad quickly. Knowing how long these treats last helps you plan how many to make at once. Refrigeration Soft dog treats stay fresh longer in the fridge. Place them in an airtight container or ziplock bag. This prevents moisture and air from … Read more

Is Your Cavalier Happy? Essential Signs & Tips to Tell

Is Your Cavalier Happy

Is your Cavalier happy? As a loving pet owner, you want the best for your furry friend. But sometimes, it’s hard to tell if your Cavalier feels content or if something is off. Understanding your dog’s happiness isn’t just about wagging tails or playful barks—it goes deeper. You’ll discover simple signs to watch for and easy ways to boost your Cavalier’s mood. Keep reading to make sure your loyal companion is as joyful as you want them to be. Credit: www.petscare.com Signs Of A Happy Cavalier Understanding your Cavalier’s happiness helps build a stronger bond. Happy dogs show clear signs through their behavior and body language. Watching for these signs lets you know your pet feels safe and loved. Recognizing happiness in your Cavalier also helps spot problems early. A joyful dog is more playful and relaxed. Here are key ways to tell if your Cavalier is happy. Body Language Cues A happy Cavalier has a relaxed body posture. Their tail usually wags gently or stays in a neutral position. Soft eyes and a slightly open mouth show comfort. Ears are up but not stiff, signaling curiosity and calmness. A loose, wiggly body means your dog feels safe. Vocal Expressions Happy Cavaliers use soft barks or quiet whines. These sounds express excitement or attention-seeking. Gentle humming or sighing shows contentment. Loud, sharp barks or growls can indicate stress or discomfort. Listen carefully to the tone and frequency of their sounds. Playfulness And Energy Levels Joyful Cavaliers love to play and explore. They run, chase toys, and enjoy games with you. Their energy is steady, not restless or tired. A happy dog eagerly greets family members. Playfulness shows a good mood and healthy spirit. Credit: www.amazon.com Common Causes Of Stress Stress affects Cavaliers just like people. It changes their mood and behavior. Knowing what causes stress helps you keep your dog happy. Many things can stress out a Cavalier. Some come from their surroundings. Others come from health or social life. Watch for signs to help your dog feel calm. Environmental Factors Loud noises can scare Cavaliers. Thunderstorms and fireworks cause stress. Crowded places may also make them uneasy. Changes in routine or new homes can confuse your dog. A quiet, safe space helps reduce stress. Health Issues Pain or illness can make a Cavalier unhappy. Dental problems, infections, or joint pain cause discomfort. Sometimes old age brings health challenges. Regular vet visits catch problems early. Healthy dogs feel more relaxed and joyful. Social Interactions Cavaliers love company but can feel stressed by strangers. Rough play or too many dogs may overwhelm them. Lack of social time can cause loneliness. Gentle, positive interactions build confidence. Balanced social time keeps your dog happy. Daily Habits For Happiness Daily habits shape your Cavalier’s mood and health. Small actions create big happiness. Regular care keeps them lively and calm. Let’s explore key habits that bring joy to your furry friend every day. Exercise And Playtime Cavaliers need daily exercise to stay happy. Short walks or play sessions help burn energy. Playtime also strengthens your bond. Toys that challenge their mind keep them sharp. A tired dog is a content dog. Nutrition And Diet Good food supports your Cavalier’s health and mood. Feed high-quality dog food suited for their age and size. Balanced meals provide energy and shine to their coat. Fresh water must always be available. Avoid giving too many treats or human food. Grooming And Comfort Regular grooming keeps your Cavalier clean and comfortable. Brush their coat to avoid mats and tangles. Check ears and teeth to prevent infections. A cozy bed and a quiet spot help them relax. Comfort is key to their daily happiness. Enhancing Emotional Well-being Enhancing your Cavalier’s emotional well-being helps keep them happy and healthy. Dogs feel joy and sadness, just like people. Caring for their feelings builds trust and love between you. Happy dogs are calmer, friendlier, and more active. Simple actions can improve your dog’s mood and life quality. Bonding Activities Spend time playing with your Cavalier every day. Gentle petting and brushing create comfort and trust. Walks outside provide fresh air and new smells. Try short games like fetch or hide-and-seek. These moments strengthen your connection and make your dog feel safe. Training And Mental Stimulation Teach your Cavalier simple commands like sit and stay. Training challenges their mind and builds confidence. Use treats and praise to encourage good behavior. Puzzle toys and scent games keep them busy. Mental exercise reduces boredom and prevents problem behavior. Creating A Safe Space Provide a quiet spot with a soft bed for rest. Keep this area free from loud noises and stress. Your dog needs a place to relax and feel secure. Familiar toys and blankets add comfort. A calm environment helps lower anxiety and supports well-being. When To Seek Veterinary Advice Knowing when to seek veterinary advice is key to your Cavalier’s well-being. Dogs cannot tell us when they feel unwell. You must watch for signs that show something is wrong. Early help can prevent serious health issues. Veterinarians have the skills to diagnose and treat many problems. Your quick action can keep your Cavalier happy and healthy. Pay close attention to any changes in behavior or body. Behavioral Changes Notice if your Cavalier acts differently. Less play, hiding, or sudden aggression can signal trouble. Changes in eating or sleeping habits matter too. Restlessness or whining may show pain or discomfort. Any unusual behavior needs a vet’s check. Physical Symptoms Look for visible signs of illness or injury. Limping, swelling, or wounds require immediate care. Coughing, sneezing, or difficulty breathing are serious. Vomiting or diarrhea lasting more than a day calls for help. Also watch for weight loss or skin problems. Professional Support Options Veterinarians offer exams, tests, and treatments. They can prescribe medicine or recommend special diets. Some vets provide behavior counseling for anxious dogs. Emergency clinics help with urgent cases. Regular check-ups keep your Cavalier in top shape. Credit: westcoastcavaliers.com Frequently Asked Questions How … Read more

Homemade Cheesecake for Dogs: Easy Safe Recipe Pups Adore

Homemade Cheesecake for Dogs

If you love spoiling your furry friend, you’ll want to try making homemade cheesecake for dogs. It’s a tasty treat that’s safe and healthy for your pup to enjoy. Imagine their excitement when you serve a dessert made just for them! You’ll discover simple recipes and tips to create delicious cheesecakes your dog will wag their tail for. Keep reading—you and your dog are about to share some special, mouthwatering moments together. Credit: allfortheloveofdogs.ca Benefits Of Homemade Dog Treats Making treats at home for your dog is a smart choice. You control every ingredient that goes in. This means better nutrition and less risk of harm. Dogs love treats, but some store-bought options contain unhealthy fillers. Homemade treats offer a safe and tasty alternative. You also save money by using simple ingredients. Healthier Ingredients Homemade treats use fresh and natural ingredients. No preservatives or artificial colors. This helps your dog stay healthy and strong. Fresh cheese and eggs are great for protein and calcium. Avoiding Harmful Additives Many commercial treats contain chemicals and additives. These can cause allergies or stomach problems in dogs. Homemade treats avoid these risks. You know exactly what your dog eats. Customization For Allergies Some dogs have food allergies or sensitive stomachs. Homemade treats let you skip common allergens like wheat or soy. You can make recipes that suit your dog’s needs. This keeps your pet happy and safe. Choosing Dog-friendly Ingredients Choosing dog-friendly ingredients is key to making safe homemade cheesecake for dogs. Not every ingredient in human desserts suits dogs. Using the right items keeps your pet healthy and happy. This section helps you pick safe cheeses, sweeteners, and extras. Each choice matters for your dog’s well-being and taste. Safe Cheeses For Dogs Dogs can enjoy certain cheeses in small amounts. Plain cheeses like mozzarella, cottage cheese, and cream cheese work well. These cheeses have less lactose, which dogs can handle better. Avoid strong or aged cheeses with high salt. Stick to fresh, mild cheeses to prevent tummy trouble. Dog-safe Sweeteners Sweeteners add flavor but not all are safe for dogs. Never use xylitol; it is toxic. Natural options like honey or small amounts of pure maple syrup are safer choices. Use sweeteners sparingly to keep the cheesecake healthy and tasty. Avoid artificial sweeteners to protect your dog’s health. Additional Healthy Add-ins Add some healthy extras to boost nutrition and flavor. Plain pumpkin puree supports digestion and adds moisture. Small bits of cooked carrot or apple offer vitamins and crunch. Avoid raisins, nuts, and chocolate as they harm dogs. Keep add-ins simple and dog-friendly to enrich your cheesecake. Simple Cheesecake Recipe For Dogs Making a cheesecake for your dog is easier than you think. This simple recipe uses safe, dog-friendly ingredients. It is perfect for special treats or celebrations. Your dog will love the creamy texture and mild flavor. Keep the recipe easy and quick. Avoid ingredients that might harm your pet. This way, you can enjoy baking and sharing a tasty snack. Gathering Ingredients Start with plain cream cheese. Use low-fat or fat-free versions. Choose natural peanut butter without xylitol. Add a bit of plain yogurt for softness. Pick an egg to bind everything. Use a small amount of oat flour. Avoid sugar, salt, or artificial sweeteners. Step-by-step Preparation Preheat the oven to 325°F (160°C). Mix cream cheese and peanut butter until smooth. Stir in the egg and yogurt. Slowly add oat flour to form a thick batter. Pour mixture into a small, greased pan. Spread evenly for a flat surface. Tap the pan to remove air bubbles. Baking And Cooling Tips Bake the cheesecake for 25 to 30 minutes. Check if the center is firm but still soft. Avoid overbaking to keep it moist. Let the cheesecake cool completely at room temperature. Then chill it in the fridge for at least two hours. Cut into small pieces before serving to your dog. Credit: allfortheloveofdogs.ca Serving And Storage Tips Serving and storing homemade cheesecake for dogs needs care. Dogs have different needs than humans. Keep their health and safety in mind. Proper portion sizes and storage keep the cheesecake fresh and safe. This section guides you on serving and storing homemade dog cheesecake. Portion Sizes For Dogs Keep servings small. Dogs have smaller stomachs than people. One or two small bites are enough. Avoid large portions to prevent stomach upset. Consider your dog’s size and weight. Puppies and small breeds need less than large dogs. Offer cheesecake as a treat, not a meal. Always watch your dog after the first serving. Storing Homemade Cheesecake Store the cheesecake in an airtight container. Keep it in the refrigerator to stay fresh. Cold temperature slows bacteria growth. Avoid leaving cheesecake out at room temperature. Serve only what your dog can eat in one sitting. Clean the container before adding new cheesecake. This helps avoid mold and spoilage. Shelf Life And Freezing Homemade cheesecake lasts about 3 to 5 days in the fridge. Check for any smell or color change before serving. Freeze cheesecake for longer storage. Wrap pieces well in plastic wrap or foil. Place them in a freezer-safe container or bag. Thaw in the refrigerator before serving. Use thawed cheesecake within 24 hours for best quality. Precautions And Allergies Making homemade cheesecake for dogs can be a fun treat. But safety is key. Some ingredients might cause allergies or upset your dog’s tummy. Knowing what to avoid helps keep your pet healthy and happy. Common Allergens To Avoid Dairy is a usual suspect. Many dogs cannot digest lactose well. Wheat and gluten can also cause issues. Some dogs react to eggs or peanuts. Avoid using artificial sweeteners like xylitol. These can be very dangerous for dogs. Signs Of Food Sensitivities Watch your dog after eating the cheesecake. Itching, redness, or swelling are signs of allergies. Vomiting or diarrhea can indicate stomach upset. Changes in energy or mood may also appear. Keep a close eye for any unusual behavior. Consulting Your Vet Talk to your … Read more

Grooming Cavalier King Charles: Essential Guide for Pet Owners

Grooming Cavalier King Charles

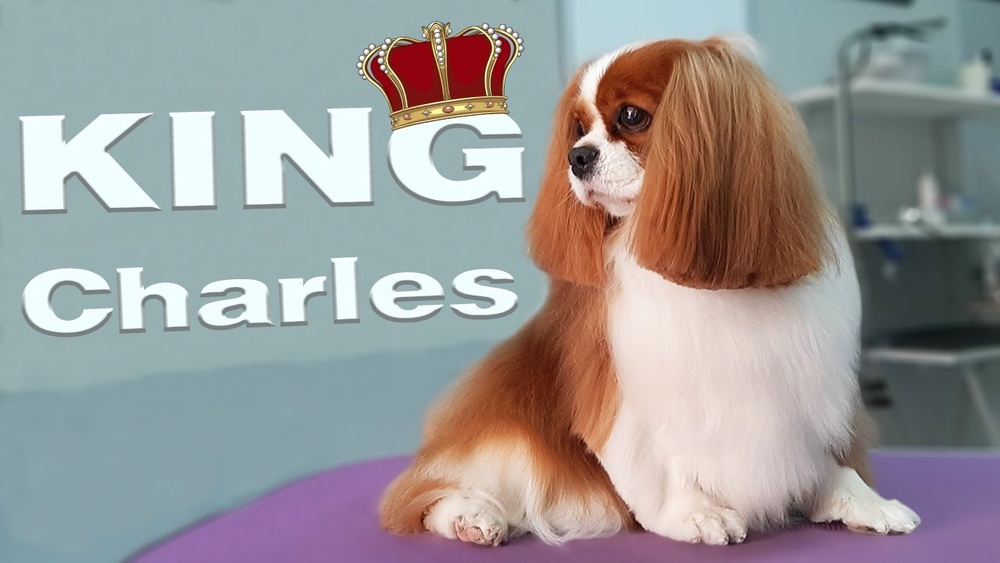
If you have a Cavalier King Charles at home, you know how special they are. Their silky coats and sweet faces make them a joy to be around. But grooming Cavalier King Charles properly takes more than just a quick brush. You want to make sure your furry friend stays healthy, comfortable, and beautiful every day. You’ll discover simple grooming tips that fit easily into your routine. By the end, you’ll feel confident caring for your Cavalier like a pro—and your pup will love the extra attention. Keep reading to learn how to make grooming a bonding moment you both look forward to. Coat Types And Their Care The Cavalier King Charles Spaniel has a soft, silky coat that needs regular care. Their coat gives them a lovely, elegant look. Proper grooming keeps their fur healthy and shiny. Understanding the coat types helps in giving the right care. This section explains how to care for their beautiful coat. Silky Coat Characteristics The Cavalier’s coat is smooth and silky to touch. It lies flat against the body without curls. The fur is medium length and flows gently. It often has feathering on the ears, chest, legs, and tail. The coat can come in four colors: Blenheim, Tricolor, Ruby, and Black & Tan. This coat type needs gentle care to avoid damage. Brushing Techniques Brushing keeps the coat free of tangles and mats. Use a soft bristle brush or a slicker brush. Brush at least three times a week for best results. Start brushing from the neck and move toward the tail. Use gentle strokes to avoid hurting your dog. Pay special attention to feathered areas, as they tangle easily. Dealing With Shedding Cavaliers shed moderately throughout the year. Shedding increases during spring and fall. Regular brushing helps remove loose hair before it falls. Bathing your dog every few weeks also reduces shedding. Use a gentle dog shampoo to keep the coat healthy. Clean your home often to manage hair around the house. Bathing Tips Bathing your Cavalier King Charles is an important part of grooming. It keeps their coat clean and healthy. Proper bathing protects their skin and fur from damage. Use gentle care to make baths comfortable and safe. Follow these tips to give your dog the best bath experience. Choosing The Right Shampoo Select a shampoo made for dogs. Avoid human shampoos; they can irritate your dog’s skin. Look for products with natural ingredients. Shampoos with oatmeal or aloe soothe sensitive skin. Choose shampoos that add moisture to prevent dryness. Always check the label for safe use on puppies if needed. Bathing Frequency Bath your Cavalier every four to six weeks. Too often can dry out their skin. Too little can cause dirt and oils to build up. Adjust frequency if your dog swims or gets dirty often. Use a gentle rinse daily to keep their coat fresh between baths. Drying Methods Use a soft towel to pat your dog dry. Avoid rubbing hard; it can tangle the fur. Use a blow dryer on low, cool setting if your dog tolerates it. Keep the dryer moving to avoid heat spots. Let your dog air dry in a warm, draft-free room if possible. Ear Cleaning Cleaning a Cavalier King Charles Spaniel’s ears is important for their health. Their long, floppy ears can trap dirt and moisture. This can cause infections and discomfort. Regular ear cleaning keeps ears fresh and prevents problems. Identifying Ear Issues Check your dog’s ears often for signs of trouble. Look for redness, swelling, or bad smell. Watch if your dog scratches or shakes its head a lot. Dark or sticky discharge can mean an infection. Notice if your dog seems sensitive when you touch its ears. Cleaning Tools And Products Use a gentle ear cleaner made for dogs. Avoid human products as they can irritate. Cotton balls or soft gauze work well for cleaning. Do not use cotton swabs inside the ear canal. Keep treats nearby to reward your dog’s calm behavior. Cleaning Procedure Start by holding your dog steady and calm. Put a few drops of ear cleaner in the ear. Massage the base of the ear gently for 20 seconds. Let your dog shake its head to remove dirt. Use a cotton ball to wipe out dirt and cleaner. Clean the outer ear only, not deep inside. Repeat on the other ear if needed. Credit: happaw.com Nail Maintenance Nail maintenance is an important part of grooming a Cavalier King Charles. Proper nail care keeps your dog comfortable and healthy. Long nails can cause pain and affect walking. Regular trimming prevents these problems and helps avoid infections. When To Trim Nails Check your Cavalier’s nails every two weeks. If you hear clicking sounds on hard floors, nails are too long. Look for nails that touch the ground when your dog stands. Trim nails before they start curling or breaking. Puppies may need more frequent checks as their nails grow fast. Safe Trimming Techniques Use sharp, dog-specific nail clippers for clean cuts. Hold the paw gently but firmly. Trim small bits of the nail at a time. Avoid cutting the quick—the pink part inside the nail. Cutting the quick causes pain and bleeding. Use a nail file to smooth rough edges after clipping. Preventing Nail Problems Keep nails short to avoid splits and breaks. Clean paws after walks to remove dirt and debris. Watch for redness or swelling around the nails. If your dog limps or licks paws often, check nails carefully. Regular grooming helps spot problems early. Visit a vet if you see infections or injuries. Dental Care Dental care is very important for Cavalier King Charles dogs. Their teeth need regular cleaning to stay healthy. Poor oral hygiene can cause pain and illness. It can also lead to bad breath and lost teeth. Taking good care of their teeth helps them live longer and feel better. Importance Of Oral Hygiene Good oral hygiene prevents plaque and tartar buildup. These cause gum disease and … Read more

Homemade Thanksgiving Dog Treats: Easy Festive Recipe Guide

Homemade Thanksgiving Dog Treats

Thanksgiving is a special time to show your loved ones how much you care—including your furry friends. Imagine your dog’s tail wagging with joy as they enjoy treats made just for them. Homemade Thanksgiving dog treats are a simple way to include your pet in the holiday fun while keeping their health in mind. You’ll discover easy recipes and tips that make baking for your dog both safe and enjoyable. Ready to make your pup feel extra loved this Thanksgiving? Keep reading to find out how! Ingredients For Dog Treats Choosing the right ingredients is key for homemade Thanksgiving dog treats. Healthy, dog-safe foods keep your pet happy and well. Avoiding bad ingredients protects your dog from harm. This guide helps you pick good foods and skip the bad ones. Dog-safe Foods To Use Sweet potatoes are a favorite. They are tasty and full of vitamins. Pumpkin is another great choice. It helps digestion and adds flavor. Peanut butter (without xylitol) makes treats rich and chewy. Plain oats and whole wheat flour work well as bases. Apples (without seeds) add sweetness and fiber. Carrots can add crunch and nutrients. These foods are safe and healthy for dogs. Avoiding Harmful Ingredients Chocolate is toxic to dogs. Never use it in treats. Onions and garlic can cause illness. Stay away from raisins and grapes. Xylitol, a sweetener, is very dangerous. Salt and sugar should be very limited. Avoid artificial flavors and preservatives. Choose simple ingredients for safety. Your dog’s health comes first. Simple Recipes To Try Making homemade Thanksgiving dog treats is fun and simple. You only need a few ingredients that are safe for dogs. These treats show your furry friend love during the holiday. They taste great and are healthy too. Try these easy recipes. Each one uses common ingredients. Your dog will enjoy the fresh flavors and textures. Pumpkin And Peanut Butter Bites Mix one cup of pumpkin puree with half a cup of peanut butter. Add one cup of whole wheat flour and a pinch of cinnamon. Stir until the dough forms. Roll out and cut into small shapes. Bake at 350°F for 15 minutes. Let cool before serving. Sweet Potato Chews Slice a sweet potato into thin strips. Place them on a baking sheet lined with parchment paper. Bake at 250°F for two hours. Flip halfway through baking. These chews are chewy and full of flavor. Store in an airtight container. Turkey And Oat Snacks Combine cooked, shredded turkey with one cup of oats and one egg. Mix well to bind the ingredients. Form small balls or flat cookies. Bake at 325°F for 20 minutes. These snacks have protein and fiber your dog needs. Baking Tips For Perfect Treats Baking homemade Thanksgiving dog treats can be fun and rewarding. Perfect treats come from simple but important baking tips. These tips help keep the treats tasty and safe for your furry friend. Follow these steps to bake treats that look good and taste great. Choosing The Right Oven Temperature Set the oven to a moderate temperature, usually around 325°F (163°C). Too hot, and treats burn outside but stay raw inside. Too low, and treats dry out too much. Use an oven thermometer to check the exact heat. This helps bake the treats evenly every time. Keep an eye on baking time, usually 20 to 30 minutes. Adjust time depending on treat size and thickness. Storage And Shelf Life Let treats cool completely before storing. Warm treats trap moisture and spoil faster. Store in an airtight container to keep them fresh. Keep the container in a cool, dry place away from sunlight. Homemade treats last about one to two weeks this way. For longer storage, freeze treats in a sealed bag. Thaw treats before giving them to your dog. Credit: simplysharonandteddy.com Creative Shapes And Decorations Making Thanksgiving dog treats is a fun way to show love. Creative shapes and decorations make treats extra special. Dogs enjoy treats that look festive and fun. Shaping and decorating treats can be simple and enjoyable. It also adds a personal touch to your pet’s snack. Using Cookie Cutters Cookie cutters help create cute and festive shapes. Pumpkins, leaves, and turkey shapes fit the Thanksgiving theme. Press the cutter firmly into the dough for clear shapes. Use small cutters to make bite-sized treats. Cookie cutters make treats look neat and professional. They also make baking faster and easier. Kids can join in to help with cutting shapes. Natural Food Colorings Natural food colorings add safe colors to your treats. Beet juice gives a lovely red or pink shade. Pumpkin puree adds a warm orange color. Spinach powder creates a gentle green tint. These colors make treats look more festive and fun. Avoid artificial dyes that might harm dogs. Natural colors keep treats healthy and vibrant. You can brush or mix colors into the dough for variety. Safety Considerations Homemade Thanksgiving dog treats are a great way to share the holiday spirit. Safety should always come first. Dogs have different needs than humans. Some ingredients can be harmful to them. Careful planning keeps your pet happy and healthy. Portion Control Too many treats can upset your dog’s stomach. Small dogs need fewer treats than big dogs. Give treats in moderation to avoid weight gain. Treats should not replace regular meals. Pay attention to how your dog reacts after eating treats. Allergy Awareness Some dogs have food allergies or sensitivities. Common allergens include wheat, dairy, and certain meats. Use simple ingredients that your dog tolerates well. Watch for signs like itching, swelling, or vomiting. Stop giving treats if you notice any symptoms. Credit: easyrecipewithfoodie.com Involving Your Dog In The Process Making homemade Thanksgiving dog treats can be a special bonding time. Including your dog adds excitement and joy to the kitchen. Dogs love to be near their owners, especially during food prep. Involving your dog helps them feel part of the celebration. It can also teach patience and good manners around food. Your dog will … Read more

Essential Oils for Dogs: Ultimate Safety Guide & Best Choices

Essential Oils for Dogs

If you care about your dog’s health, you want the best natural ways to keep them happy and comfortable. Essential oils for dogs have become a popular choice for many pet owners looking to improve their furry friend’s well-being. But with so much information out there, you might be wondering which oils are safe and how to use them properly. This guide will help you understand the benefits, risks, and tips you need to know to make the right choices for your dog’s care. Keep reading to discover how essential oils can support your dog’s health in a gentle and effective way. Credit: hutchpaving.com Benefits Of Essential Oils Essential oils offer many benefits for dogs. They can support health and comfort in gentle ways. Using the right oils safely helps dogs feel better naturally. Essential oils often serve as a natural option for common dog needs. Calming Effects Essential oils like lavender help calm anxious dogs. They reduce stress during storms or travel. A few drops in a diffuser create a peaceful space. This helps dogs relax without medicine. Calming oils improve mood and ease nervous energy. Skin And Coat Health Oils such as chamomile and tea tree support skin healing. They soothe itchy, dry, or irritated skin safely. Regular use can improve coat shine and softness. These oils help with minor skin problems naturally. They keep your dog’s coat healthy and fresh. Repelling Pests Cedarwood and peppermint oils repel fleas and ticks. They act as natural insect deterrents without chemicals. Using oils around bedding or collars keeps pests away. This protects dogs from bites and discomfort. Essential oils offer a gentle way to fight pests. Safe Oils For Dogs Essential oils can be helpful for dogs when used safely. Some oils have calming and healing effects. It is important to choose oils that are gentle and non-toxic for pets. These oils should be diluted before use. Always watch your dog for any bad reactions. Lavender Lavender oil is one of the safest oils for dogs. It helps reduce stress and anxiety. It can also soothe minor skin irritations. Use a small amount and dilute it well. Avoid using pure oil directly on your dog’s skin. Chamomile Chamomile oil calms dogs and supports healthy skin. It works well for dogs with allergies or itchy skin. Diluted chamomile can also ease stomach discomfort. Always test a small area first to check for sensitivity. Frankincense Frankincense oil promotes healing and boosts the immune system. It can help with skin issues and inflammation. Use only a few drops mixed with a carrier oil. Keep the oil away from your dog’s eyes and nose. Oils To Avoid Essential oils can be helpful for dogs, but some are very dangerous. Knowing which oils to avoid protects your pet’s health. These oils can cause poisoning, skin problems, or breathing issues. Always keep these oils away from your dog’s skin and nose. Tea Tree Tea tree oil is popular for humans but toxic to dogs. Even small amounts can cause weakness, vomiting, and trouble walking. Avoid using tea tree oil on or near your dog. Its strong chemicals affect dogs much more than people. Pennyroyal Pennyroyal oil can harm dogs seriously. It can cause liver damage and seizures. This oil is sometimes used for insect repellent but is unsafe for pets. Keep pennyroyal oil far from your dog’s reach. Citrus Oils Citrus oils like lemon, orange, and lime are harmful to dogs. They can cause skin irritation and stomach upset. The strong smell can also bother dogs’ sensitive noses. Avoid applying citrus oils directly on your dog. Application Methods Applying essential oils to dogs requires care and knowledge. Using the right method helps keep your dog safe and comfortable. Different application methods serve different purposes. Some help calm your dog. Others support skin health or freshen the air around them. Topical Use Topical application means putting oils on your dog’s skin. Always apply oils to clean, dry areas. Common spots include the neck, chest, or paws. Avoid sensitive parts like eyes, nose, and genitals. Gently massage the oil to help it absorb. Watch your dog for any irritation or reaction. Stop use if you see redness or itching. Diffusion Diffusing oils releases a gentle scent in the air. Use a diffuser in a well-ventilated room. Keep your dog in the room but allow space to leave. Avoid strong or continuous diffusion. Limit sessions to 30 minutes to prevent stress. Choose calming oils like lavender or chamomile for diffusion. Dilution Guidelines Essential oils are strong and must be diluted for dogs. Use a carrier oil like coconut or olive oil. A safe dilution ratio is one drop of essential oil to 50 drops of carrier oil. For small dogs, use even less oil. Never apply undiluted oils directly on your dog. Always test a small area first for any sensitivity. Signs Of Adverse Reactions Essential oils can benefit dogs but may cause side effects. Recognizing signs of adverse reactions helps keep pets safe. Watch your dog closely after using any oil. Early detection prevents serious health problems. Allergic Responses Dogs may show redness or swelling on skin. Itching and scratching are common allergic signs. Some dogs develop hives or rashes. Sneezing and watery eyes can also occur. These symptoms mean your dog may be allergic. Toxicity Symptoms Oils can be toxic if used wrongly. Vomiting and diarrhea are warning signs. Excessive drooling or difficulty breathing needs attention. Weakness or unsteady walking indicates poisoning. Watch for sudden changes in behavior or energy. When To Seek Vet Help Contact a vet if symptoms worsen or last long. Severe breathing trouble or collapse needs emergency care. Persistent vomiting or diarrhea requires prompt treatment. Do not wait if your dog acts very sick. Quick action can save your dog’s life. Diy Essential Oil Blends DIY essential oil blends offer a safe way to support your dog’s health. Using natural oils can calm nerves, repel pests, and soothe skin. Mixing your own … Read more

4 Ingredient Homemade Puppuccino: Easy Recipe Dogs Love

4 Ingredient Homemade Puppuccino

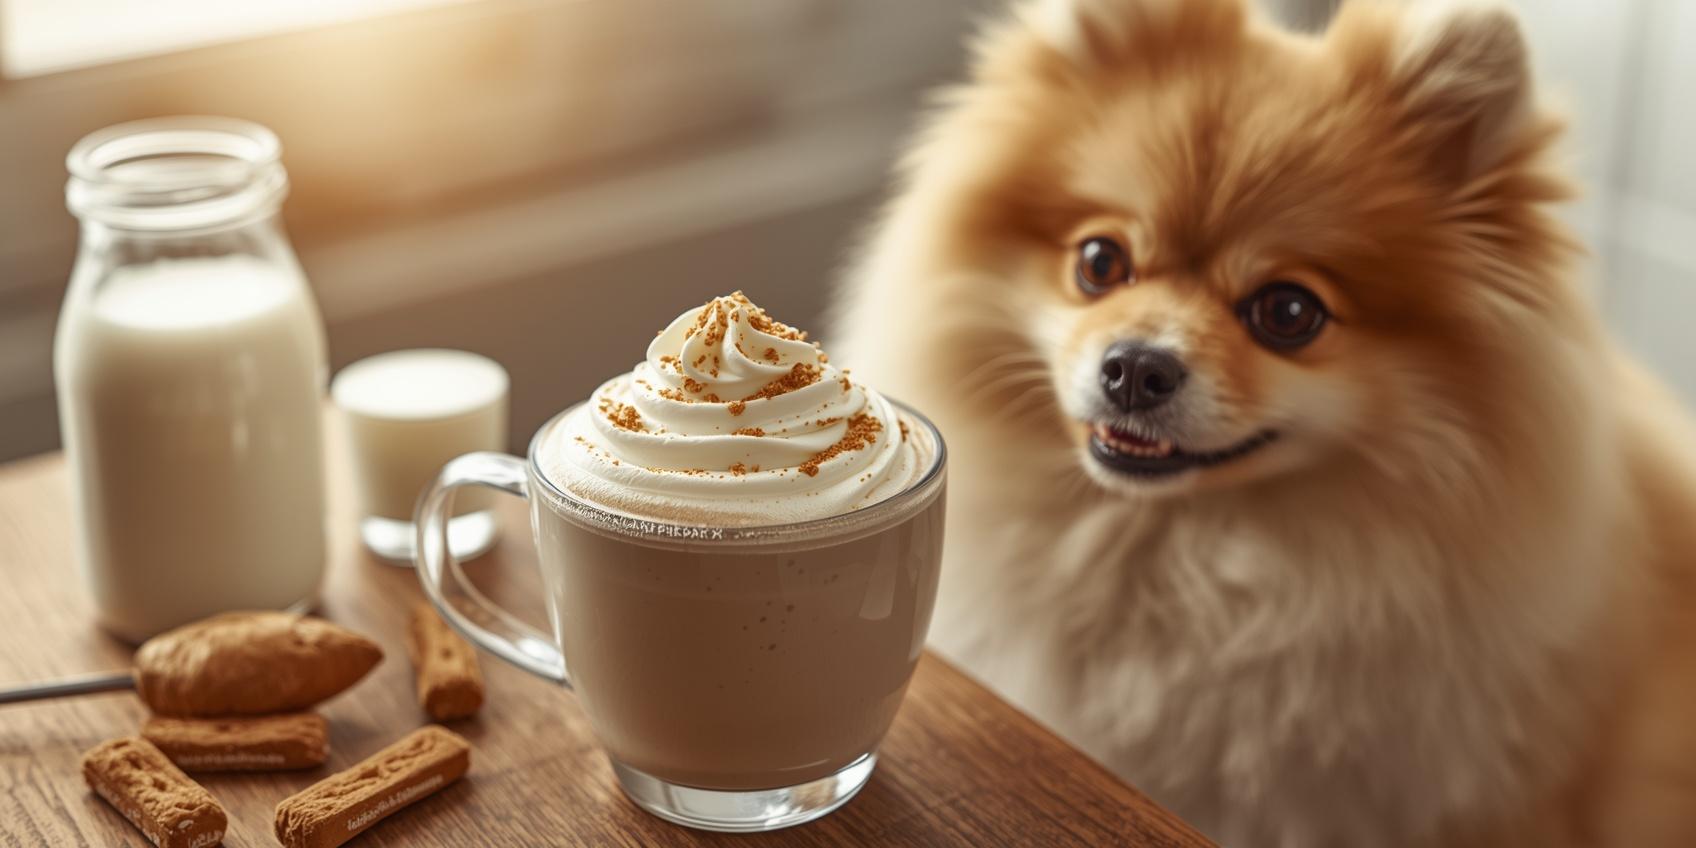
Do you want to treat your furry friend with something special that’s easy and safe? A 4 Ingredient Homemade Puppuccino is the perfect way to show your pup some love without breaking the bank or spending hours in the kitchen. You’ll learn how simple ingredients can come together to create a delicious, creamy treat your dog will adore. Keep reading, and you’ll discover a quick recipe that’s healthy, tasty, and made just for your best buddy. Credit: www.foodlovinfamily.com Puppuccino Basics Understanding Puppuccino basics helps you treat your dog with a tasty, safe drink. Puppuccinos are simple, fun, and a great way to bond with your pet. Making Puppuccinos at home lets you control ingredients. You avoid harmful additives and keep your dog healthy. What Is A Puppuccino A Puppuccino is a small cup of whipped cream. It is a popular dog treat from coffee shops. Dogs enjoy the creamy texture and mild sweetness. It does not contain caffeine or chocolate, which are harmful to dogs. Why Make It At Home Homemade Puppuccinos are fresher and safer. You choose natural ingredients without preservatives or sugar. You can adjust the recipe for dogs with allergies or sensitivities. Making it yourself saves money and gives you control over quality. Credit: thedogdarling.com Essential Ingredients The essential ingredients for a 4 Ingredient Homemade Puppuccino are simple and easy to find. These ingredients create a tasty treat that your dog will love. Each one plays a special role in making the perfect puppuccino. Using fresh and quality ingredients ensures the best flavor and texture. These ingredients keep the puppuccino safe and healthy for your pet. Let’s explore each one in detail. Heavy Whipping Cream Heavy whipping cream is the main ingredient. It creates the rich, creamy texture puppuccinos need. Choose a fresh, high-quality cream with no added flavors. It whips easily and holds its shape well for your dog’s treat. Vanilla Extract Vanilla extract adds a mild, sweet flavor to the puppuccino. Use pure vanilla extract without alcohol or artificial additives. It enhances the taste without harming your pet. Just a small amount is enough to bring out the flavor. Sweetener Options Sweeteners make the puppuccino tastier but choose pet-safe ones. Honey is a natural choice and works well in small amounts. Avoid artificial sweeteners like xylitol, which are toxic to dogs. You can also skip sweeteners for a simple, natural treat. Optional Toppings Toppings add fun and extra flavor to the puppuccino. Small dog-safe treats or crushed biscuits work great. Avoid chocolate or sugary toppings that can harm your dog. Use toppings sparingly to keep the treat healthy and enjoyable. Step-by-step Recipe Making a homemade Puppuccino is quick and simple. This step-by-step guide shows how to create a tasty treat your dog will love. Follow these easy steps to prepare a fresh Puppuccino with just four ingredients. Preparing The Cream Start with heavy whipping cream. Pour one cup into a mixing bowl. Use a hand mixer or whisk to whip the cream. Whip until soft peaks form. This means the cream holds shape but is still smooth. Avoid over-whipping to keep it light and fluffy. Mixing Ingredients Add one tablespoon of vanilla extract to the whipped cream. Next, add two tablespoons of sweetened condensed milk. Gently fold the mixture to combine all ingredients. Mix until smooth and creamy. The sweetness will appeal to your dog’s taste buds. Serving Suggestions Serve the Puppuccino in a small cup or bowl. Offer it as a special treat on warm days. Sprinkle a few dog-safe toppings like crushed biscuits or a small amount of peanut butter. Always watch your dog while they enjoy this refreshing snack. Credit: princesspinkygirl.com Health And Safety Tips Health and safety are very important when making a Puppuccino for your dog. You want to give your pet a tasty treat without any risks. This section covers key tips to keep your dog safe and happy with this homemade drink. Ingredients Safe For Dogs Use only dog-friendly ingredients. Plain low-fat or non-fat milk is best. Avoid sweeteners and artificial flavors. Whipped cream should be free from xylitol or harmful chemicals. Simple, natural items keep your dog healthy. Portion Control Serve Puppuccinos in small amounts. A few tablespoons are enough for most dogs. Too much milk or cream can cause upset stomach. Keep treats occasional, not daily. This helps prevent weight gain and digestive problems. Avoiding Harmful Additives Check labels carefully. Many store-bought creams have sugars and preservatives. Avoid these additives to protect your dog’s health. Homemade whipped cream is a safer choice. Stay clear of chocolate, caffeine, and artificial sweeteners. Variations To Try Homemade puppuccinos are simple and fun to make. You can change the recipe to suit your dog’s tastes or needs. Small changes create new flavors and options. Here are some easy variations to try for your furry friend. Flavored Puppuccinos Add a small drop of vanilla extract for a sweet taste. Mix in a pinch of cinnamon for a warm flavor. Try peanut butter powder for a nutty twist. These flavors keep the puppuccino interesting and tasty. Dairy-free Options Use coconut milk instead of regular milk for a dairy-free drink. Almond milk also works well and is gentle on dogs. Oat milk is another good choice, creamy and mild. These options suit dogs with milk allergies or sensitivities. Seasonal Twists In winter, add a small sprinkle of pumpkin spice for warmth. During summer, blend in a little fresh watermelon juice for freshness. For fall, mix in some pureed sweet potato for richness. Seasonal flavors make puppuccinos special all year. Storing And Serving Making a 4 Ingredient Homemade Puppuccino is fun and simple. Knowing how to store and serve it keeps your dog happy and healthy. Proper care ensures the Puppuccino stays fresh and tasty. Let’s explore easy ways to store and serve this treat. Storage Tips Store the Puppuccino in an airtight container. Keep it in the refrigerator for up to two days. Avoid leaving it out at room temperature. Cold storage … Read more

Carrot Dog Treat Recipes: Easy Healthy Snacks Your Pup Loves

Carrot Dog Treat Recipes

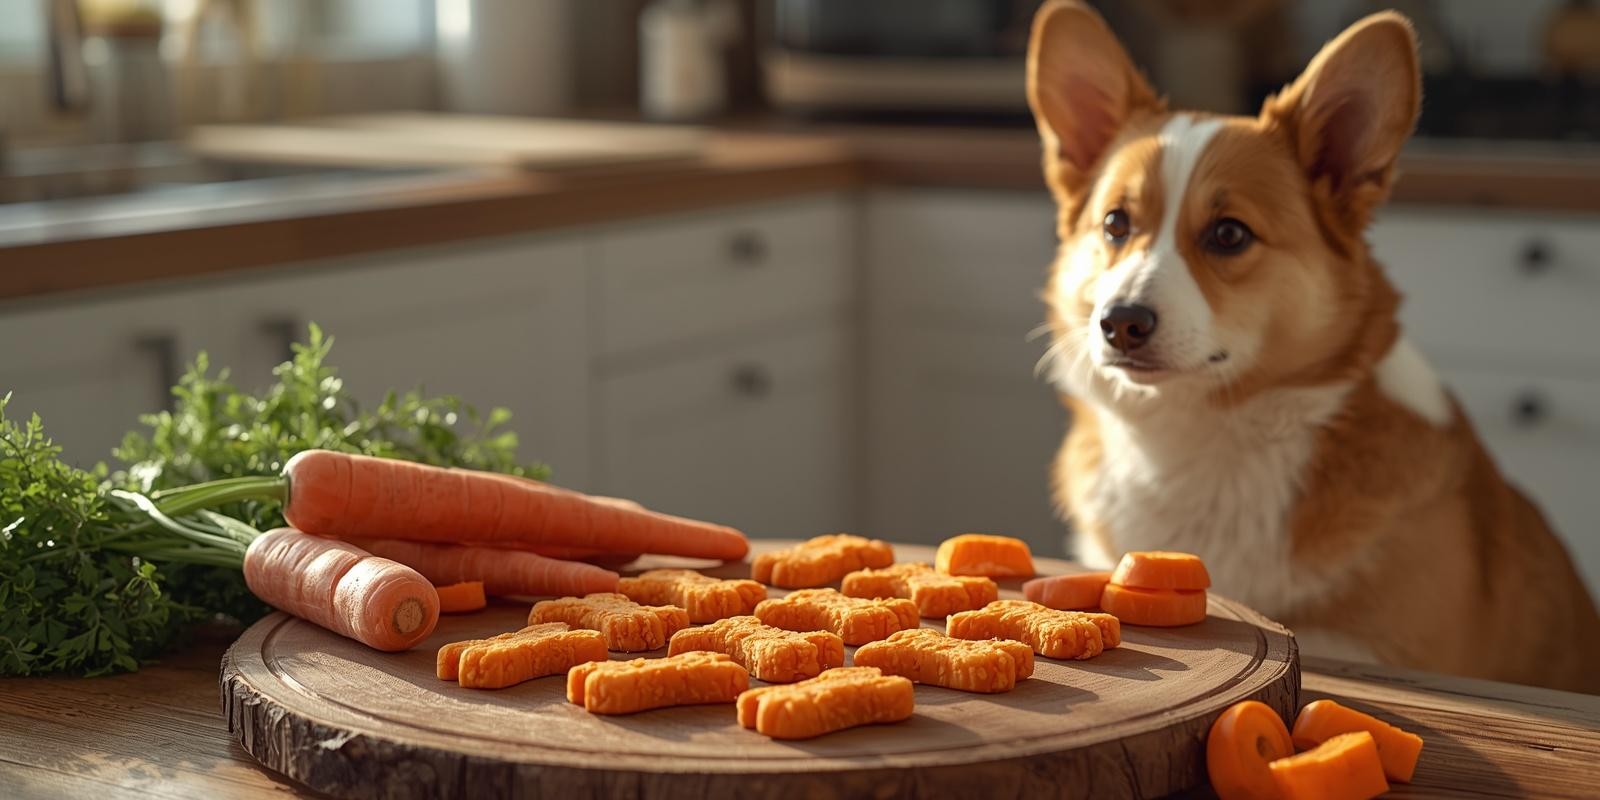
If you want to treat your furry friend to something healthy and delicious, carrot dog treat recipes are a perfect choice. You might think treats are just snacks, but the right ones can boost your dog’s health and happiness. Imagine giving your dog a crunchy, tasty snack made from simple ingredients you trust. You’ll find easy recipes that save you money and show your dog just how much you care. Ready to make your dog’s tail wag even more? Keep reading! Credit: www.nelliebellie.com Benefits Of Carrot Treats Carrot treats offer many benefits for your dog’s health and happiness. They are easy to make and loved by most dogs. These treats provide good nutrition and keep your pet active. Using carrots as a treat can support your dog’s well-being. They are a simple, tasty option that fits any diet. Nutritional Value Carrots are full of vitamins like A, C, and K. They also contain fiber, which helps digestion. These nutrients support healthy skin and a strong immune system. Carrots have antioxidants that protect cells from damage. This makes them a nutritious choice for dogs. Health Advantages For Dogs Chewing carrots helps clean dogs’ teeth naturally. It reduces plaque and keeps gums healthy. Carrots also support eye health because of their vitamin A. They can improve digestion and reduce constipation. Regular carrot treats can boost your dog’s overall health. Low-calorie Snack Option Carrots have few calories, making them a great snack. They help dogs stay full without gaining weight. This is perfect for dogs on a diet or less active. Low calories mean fewer chances of obesity problems. You can safely give carrots as treats every day. Credit: reluctantentertainer.com Choosing The Right Carrots Choosing the right carrots is key for healthy dog treats. Carrots should be safe, tasty, and full of nutrients. Picking the best type can make your homemade treats better. This helps keep your dog happy and strong. Organic Vs. Conventional Organic carrots grow without synthetic pesticides or fertilizers. They usually have fewer chemicals on their surface. This makes them a safer choice for pets. Conventional carrots may have pesticide residues. Washing well can reduce these residues. Organic carrots often cost more but offer peace of mind. Both types provide vitamins and fiber your dog needs. Freshness And Storage Tips Fresh carrots are crunchy and sweet. Look for bright orange color and firm texture. Avoid carrots with soft spots or mold. Store carrots in the fridge’s vegetable drawer. Keep them in a plastic bag to stay moist. Use carrots within two weeks for best taste. For longer storage, carrots freeze well after chopping. Freshness keeps treats delicious and nutritious for your dog. Basic Carrot Dog Treat Recipe Carrot dog treats offer a healthy, tasty snack for your furry friend. This basic carrot dog treat recipe uses simple ingredients. It is easy to make at home. Your dog will love the fresh carrot flavor and crunchy texture. These treats are perfect for training or just a nice reward. You can control what goes into the treats. No preservatives or artificial flavors. Just wholesome ingredients that support your dog’s health. Ingredients Needed Step-by-step Preparation Creative Carrot Treat Variations Carrots make a great base for dog treats. They are healthy, crunchy, and full of vitamins. Mixing carrots with other simple ingredients creates tasty snacks your dog will love. These treats are easy to make at home and perfect for any dog size. Try these creative carrot treat recipes to give your dog a new flavor twist. Each recipe uses natural ingredients that are safe and healthy. These treats can also help keep your dog’s teeth clean and gums healthy. Carrot And Peanut Butter Bites Mix grated carrots with peanut butter and a little flour. Form small balls and bake until firm. These bites are soft and chewy, perfect for training rewards. Use peanut butter without xylitol to keep it safe for dogs. Carrot And Oatmeal Cookies Combine shredded carrots with oats, eggs, and a bit of honey. Roll the dough and cut into small cookie shapes. Bake until golden brown. These cookies are crunchy and full of fiber. Great for dogs who like a little crunch in their treats. Carrot And Sweet Potato Chews Slice carrots and sweet potatoes thinly. Bake them slowly to dry out and become chewy. These chews are natural and help clean teeth. They last longer and satisfy dogs who love to chew. Baking And Storage Tips Baking and storing carrot dog treats properly keeps them tasty and safe for your pet. Good baking ensures treats are cooked through but not too hard. Proper storage helps maintain freshness and texture. These tips make your homemade treats last longer and stay delicious. Optimal Baking Times Bake carrot dog treats at 350°F (175°C). Small treats need about 15 minutes. Larger treats may take 20 to 25 minutes. Check treats often to avoid burning. Treats should be firm but not too hard. Let them cool before giving to your dog. Keeping Treats Fresh Store treats in an airtight container. Keep them in a cool, dry place. Avoid direct sunlight or heat. Homemade treats last up to two weeks this way. For longer storage, freeze treats in a sealed bag. Thaw before serving. Fresh treats keep your dog happy and healthy. Credit: www.pookspantry.com Safety Tips For Homemade Treats Making carrot dog treats at home is fun and healthy. Safety is important to keep your dog happy and well. Homemade treats need careful attention to ingredients and serving sizes. This keeps your dog safe from health risks. Simple rules help you make safe treats. Follow these tips to avoid harm and feed the right amount. Your dog will enjoy tasty, safe snacks every time. Avoiding Harmful Ingredients Some foods are harmful to dogs. Avoid onions, garlic, chocolate, and grapes. These can cause sickness or worse. Use fresh carrots and dog-safe ingredients only. Check every ingredient before mixing. Avoid artificial sweeteners like xylitol. They are toxic to dogs. Stick to natural, simple items for … Read more