Doggy Scout

Homemade Halloween Dog Treats: Easy Spooky Recipes Dogs Love
Homemade Halloween Dog Treats

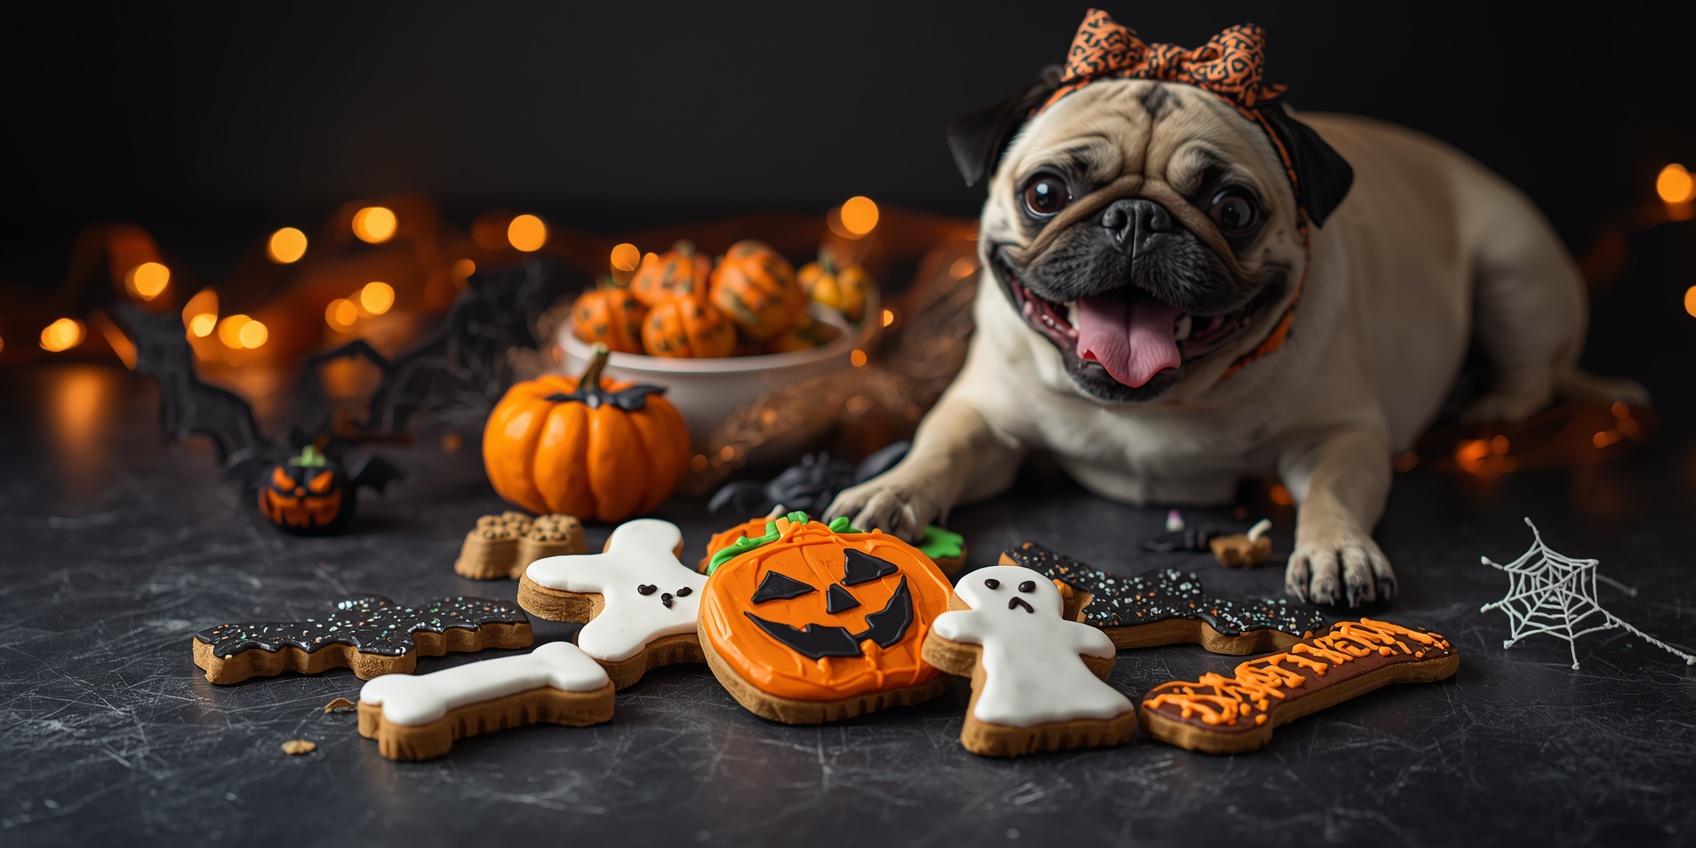
Halloween is a special time for you and your furry friend to celebrate together. But while you’re picking out costumes and treats for yourself, what about your dog? Homemade Halloween dog treats are a fun, safe way to include your pet in the festivities. Imagine giving your dog tasty snacks made with ingredients you trust, without the worry of harmful additives. You’ll discover simple recipes that will make your dog’s tail wag with joy—and keep them healthy too. Ready to treat your best friend to something truly special this Halloween? Keep reading! Credit: hutchpaving.com Ingredients For Dog Treats Choosing the right ingredients for homemade Halloween dog treats matters a lot. Healthy ingredients keep dogs happy and safe. Using natural and simple items helps make tasty treats. Avoid anything that can upset your dog’s stomach or cause harm. Pick ingredients that are easy to digest and full of nutrition. Many common kitchen items work well for dog treats. Fresh fruits, vegetables, and whole grains often make great bases. It is best to know what is safe and what is not. Safe Ingredients To Use Plain pumpkin is a top choice. It helps digestion and adds flavor. Peanut butter without xylitol is a favorite. Dogs love the taste and texture. Oats and whole wheat flour provide good energy. Sweet potatoes offer vitamins and fiber. Carrots add crunch and natural sweetness. Eggs work as a binder and protein source. Plain yogurt gives calcium and aids digestion. Avoiding Harmful Foods Chocolate is toxic to dogs and must never be used. Grapes and raisins cause kidney problems. Onions and garlic hurt red blood cells. Nuts like macadamia can cause weakness and tremors. Artificial sweeteners, especially xylitol, are deadly. Raw dough with yeast can expand and block the stomach. High salt or sugar harms your dog’s health. Always double-check ingredients before baking treats. Credit: www.dalmatiandiy.com Simple Treat Recipes Making homemade Halloween dog treats is fun and easy. Simple recipes use safe, healthy ingredients. You can prepare tasty snacks your dog will love. These treats are perfect for the spooky season. Pumpkin And Peanut Butter Biscuits Mix 1 cup pumpkin puree with 1/2 cup peanut butter. Add 2 cups whole wheat flour and 1 egg. Stir until dough forms. Roll out and cut into shapes. Bake at 350°F for 20 minutes. Let cool before serving. Sweet Potato Chews Slice sweet potatoes into thin strips. Place on a baking sheet. Bake at 250°F for 3 hours. Turn halfway through baking. Let cool until chewy. These chews are healthy and tasty. Apple Cinnamon Bites Combine 1 cup oats, 1/2 cup unsweetened applesauce, and 1/2 teaspoon cinnamon. Mix well. Form small balls and flatten. Place on a baking sheet. Bake at 350°F for 15 minutes. Cool before giving to your dog. Baking Tips Baking homemade Halloween dog treats is fun and rewarding. Getting the baking right makes treats tasty and safe for dogs. Small changes in oven settings or timing can affect the texture and flavor. Proper storage keeps treats fresh longer. These tips help you bake perfect treats every time. Oven Settings And Timing Preheat the oven to the correct temperature. Most dog treats bake well at 325°F (160°C). Use the middle rack for even heat. Set a timer and check treats early to avoid burning. Bake until treats are firm but not too hard. Let them cool completely on a wire rack before serving. Storage And Shelf Life Store treats in an airtight container to keep moisture out. Keep the container in a cool, dry place. Homemade treats usually last one to two weeks. For longer storage, freeze treats in a sealed bag. Thaw them before giving to your dog. Always check for mold or bad smell before use. Decorating Ideas Decorating homemade Halloween dog treats makes them extra special. It shows your love and care for your furry friend. Simple decorations can turn plain treats into festive snacks. Use safe ingredients and easy techniques to keep it fun and healthy. Natural Coloring Options Use natural colors to keep treats safe and tasty. Beet juice adds a bright red shade. Pumpkin puree gives an orange tint. Spinach powder works well for green coloring. Turmeric offers a warm yellow color. Mix these into the dough or brush on after baking. Avoid artificial dyes that may harm pets. Fun Halloween Shapes Choose shapes that match the spooky theme. Bones, pumpkins, bats, and ghosts are popular choices. Use cookie cutters for clean, sharp shapes. Hand-cut shapes work fine too. Try layering small shapes for extra fun. These shapes make treats look festive and inviting. Safety Precautions Homemade Halloween dog treats are a fun way to celebrate with your pet. Safety is key when making and giving these treats. Dogs have different needs than humans. Some ingredients can harm them. Careful steps keep your dog happy and healthy during Halloween. Allergy Awareness Check your dog’s allergies before making treats. Some dogs react badly to common foods like wheat or dairy. Use simple ingredients that your dog knows. Avoid chocolate, grapes, onions, and anything toxic to dogs. Watch for signs of allergies after eating, like itching or vomiting. Stop feeding the treat if you see these signs. Portion Control Give treats in small amounts. Too many treats can upset your dog’s stomach. Treats should not replace regular meals. Use treats as a reward or special snack. Small pieces are easier to digest and less likely to cause weight gain. Keep treats balanced with your dog’s daily diet. Credit: www.dalmatiandiy.com Treat Packaging Packaging homemade Halloween dog treats is just as important as baking them. It keeps the treats fresh and safe. It also makes the gift look special. Thoughtful packaging shows care and adds fun to the Halloween spirit. Creative Wrapping Ideas Use clear cellophane bags to show off the treats inside. Tie the bags with orange or black ribbon for a Halloween touch. Small mason jars with a festive label also work well. Wrap treats in tissue paper with spooky prints. Use … Read more
Spay or Neuter Surgery: Essential Guide for Pet Owners

Spay or Neuter Surgery

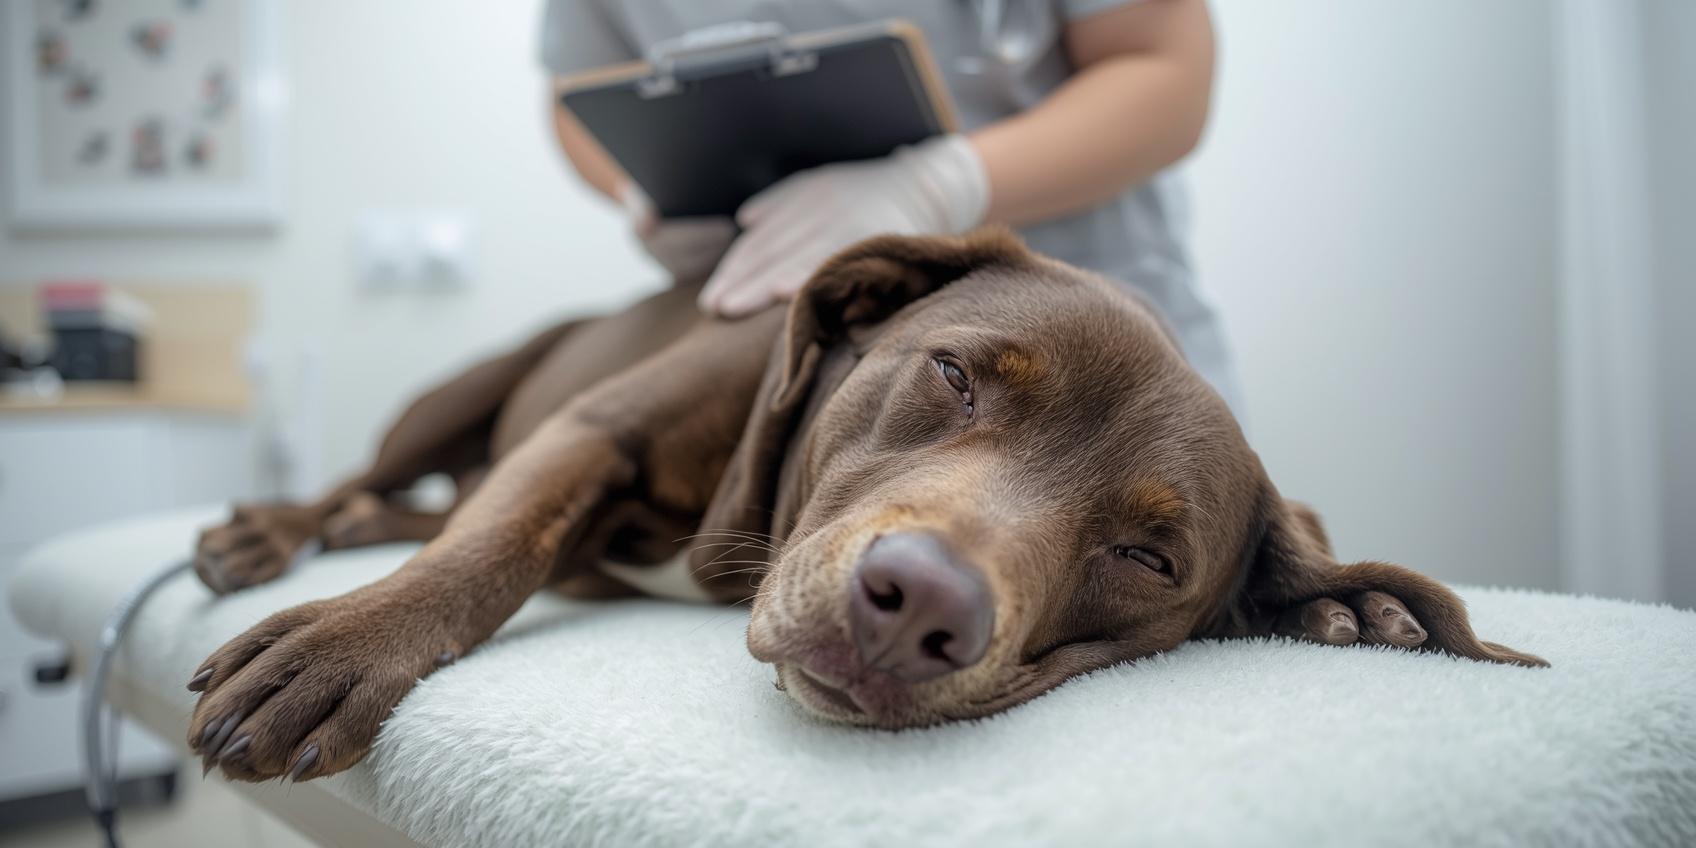
If you have a pet, you’ve probably heard about spay or neuter surgery. But do you really know why it’s so important for your furry friend? This simple procedure can protect your pet’s health, improve their behavior, and even help control the pet population. Understanding what spay or neuter surgery involves and how it benefits your pet will help you make the best choice for their well-being. Keep reading to discover everything you need to know to keep your companion happy and healthy. Benefits Of Spaying And Neutering Spaying and neutering pets offer many important benefits. These surgeries help keep pets healthy and calm. They also play a key role in controlling the number of homeless animals. Understanding these benefits can help pet owners make smart choices for their furry friends. Health Advantages Spaying and neutering lower the risk of certain cancers. Females have less chance of uterine infections and breast tumors. Males avoid testicular cancer and some prostate problems. These surgeries also reduce the risk of painful infections. Pets tend to live longer and healthier lives after surgery. Behavioral Improvements Neutered pets often show less aggression. They are less likely to roam far from home. Spayed females do not go into heat, avoiding related behaviors. These changes make pets easier to train and live with. Calm pets create a safer and happier home environment. Population Control Spaying and neutering prevent unwanted litters. This helps reduce the number of homeless animals. Shelters become less crowded and can care better for pets. Fewer stray animals mean less risk of disease spread. Controlling the population saves many lives and resources. Credit: vetmed.illinois.edu When To Schedule Surgery Deciding the right time for spay or neuter surgery is important for your pet’s health. The timing affects recovery and long-term benefits. Knowing when to schedule helps avoid risks and supports your pet’s growth. Veterinarians recommend certain ages based on species and breed. Your pet’s size and health also play a role in timing the surgery. Watch your pet closely to know when they are ready. Ideal Age For Pets Most pets can have surgery between four and six months old. This age allows them to grow strong before the procedure. Smaller breeds may have surgery earlier, while larger breeds might wait longer. Puppies and kittens often heal faster at this age. Early surgery helps prevent unwanted behaviors and health issues. Signs Your Pet Is Ready Your pet should be healthy and active before surgery. They need to eat well and have no infections. A calm temperament helps during recovery. Check with your vet if your pet has any health problems. Clear eyes, normal breathing, and good energy are good signs. Your vet will examine your pet to confirm readiness. Surgical Procedure Details Spay or neuter surgery is a common procedure for pets. It helps control pet populations and improves health. Understanding the surgical steps can reduce fear. Knowing what happens during surgery makes the process clearer. What Happens During Surgery The surgery starts with a small cut near the pet’s belly. For females, the vet removes the ovaries and uterus. For males, the vet removes the testicles. The surgery usually takes less than an hour. The vet carefully closes the cut with stitches. The pet wakes up slowly in a quiet room. The vet watches the pet to make sure it feels okay. Most pets go home the same day. Types Of Anesthesia Used Pets receive anesthesia to stay calm and pain-free. The vet uses general anesthesia, which makes pets sleep deeply. This stops pain and movement during surgery. Before surgery, the vet may give a mild sedative. This helps pets relax before anesthesia. After surgery, pain medicine helps pets heal comfortably. The vet chooses safe drugs for each pet. Risks And Complications Spay or neuter surgery is a common procedure for pets. It helps control the animal population and can improve health. Like all surgeries, it carries some risks and possible complications. Knowing these helps pet owners prepare and care for their pets better. Common Side Effects Some side effects happen often but are usually mild. Pets may feel sleepy or tired for a day or two. Swelling or bruising near the surgery site can occur. Mild bleeding or scabbing is normal as the wound heals. Pets might lose their appetite for a short time. These effects generally go away within a few days. Monitoring the pet closely can catch any problems early. Rare But Serious Issues Serious complications are rare but need quick attention. Infection at the surgery site can happen if bacteria enter the wound. Signs include redness, swelling, and discharge. Internal bleeding is another risk, causing weakness or pale gums. Some pets may react badly to anesthesia with breathing or heart problems. A vet should be called immediately if any unusual symptoms appear. Early treatment can prevent worse outcomes. Post-surgery Care Post-surgery care is very important after spay or neuter surgery. Proper care helps pets heal faster. It also prevents infections and other problems. Owners should follow the vet’s advice closely. The right care makes a big difference in recovery. Recovery Tips Keep your pet calm and quiet for several days. Avoid running, jumping, or rough play. Use a clean, soft bed in a quiet room. Check the surgery site daily for redness or swelling. Do not let your pet lick or bite the area. Use an Elizabethan collar if needed. Give all medicines exactly as the vet says. Offer small meals at first, then normal food after 24 hours. Keep water available at all times. Monitoring For Problems Watch for signs of infection like redness, swelling, or bad smell. Notice if your pet has fever or seems very tired. Look for unusual bleeding or discharge from the surgery site. Check if your pet stops eating or drinking. Monitor for vomiting or diarrhea. Contact your vet right away if any problems appear. Early action can prevent serious issues. Keep a close eye on your pet’s behavior every day. Cost And … Read more

Trimming Your Cavalier’s Nails: Essential Safe Steps Guide

Trimming Your Cavalier's Nails

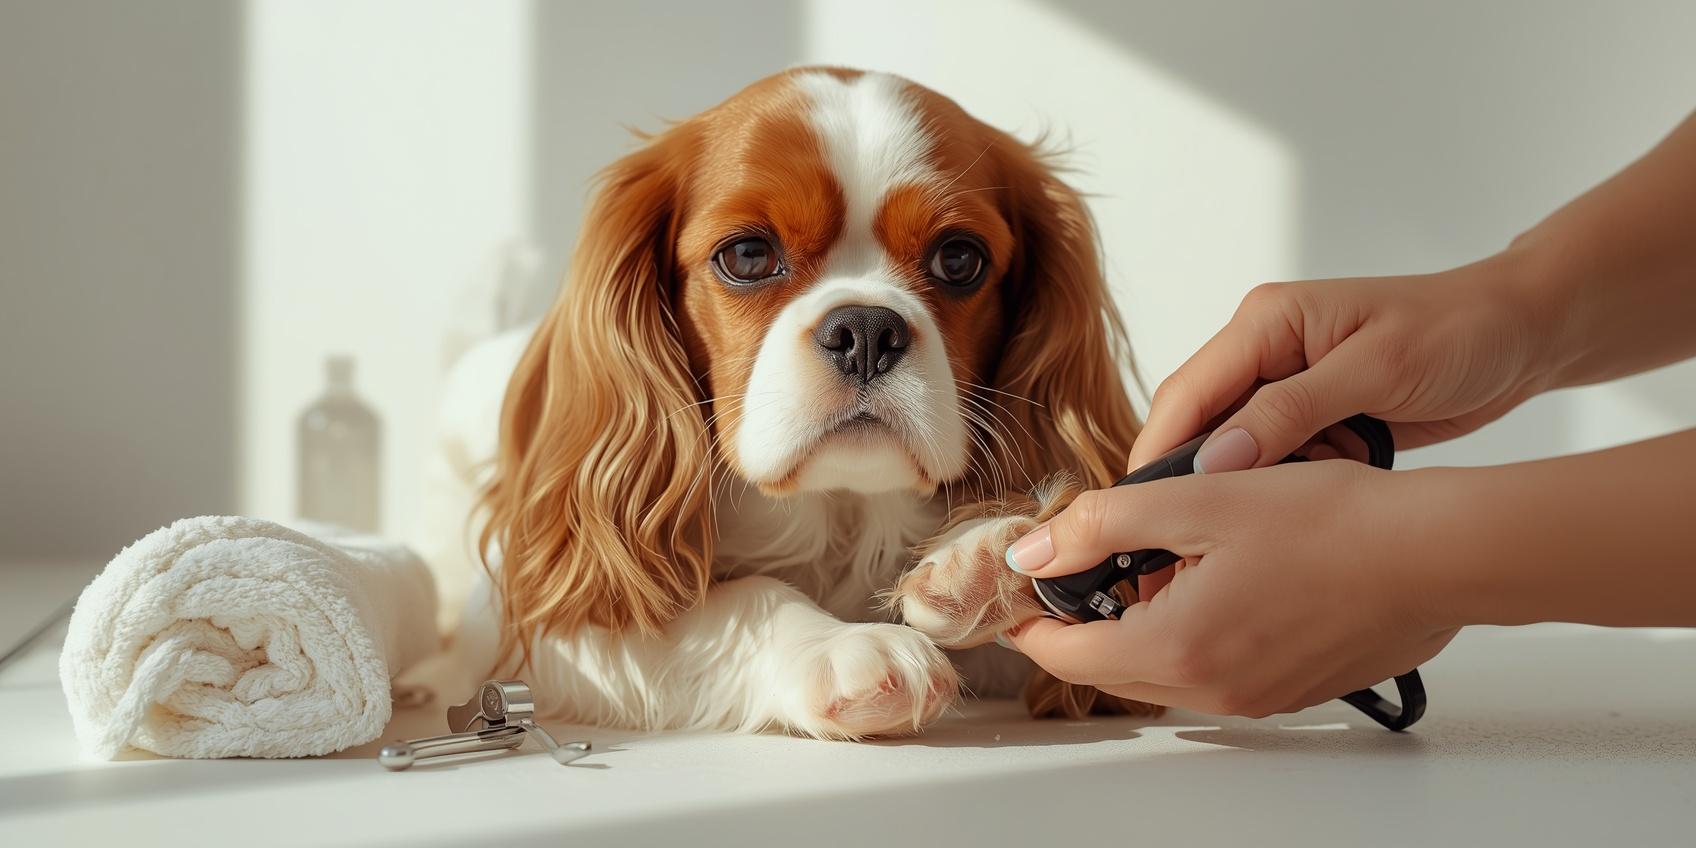
Taking care of your Cavalier’s nails is more important than you might think. If you’ve ever noticed your dog scratching the floor or heard clicking sounds when they walk, their nails might be too long. Trimming your Cavalier’s nails not only keeps them comfortable but also helps prevent pain and injuries. But if you’re unsure how to do it right, don’t worry—you’re in the right place. Keep reading, and you’ll learn simple, safe steps to make nail trimming easy and stress-free for both you and your furry friend. Credit: www.youtube.com Why Nail Care Matters Trimming your Cavalier’s nails is more than just grooming. It keeps your dog healthy and happy. Nails that grow too long can cause pain and other problems. Regular nail care helps avoid these issues. Understanding why nail care matters makes it easier to keep up with this task. Health Benefits Long nails can hurt your Cavalier’s paws. They may cause cracks or infections. Nails that grow too much can change the way your dog walks. This leads to joint pain and muscle strain. Keeping nails short helps your dog move comfortably. It also reduces the risk of injuries during play or walks. Behavioral Impact Dogs with long nails often feel uncomfortable. They might lick or bite their paws more. Discomfort can make your Cavalier restless or nervous. Trimming nails keeps your dog calm and relaxed. A happy dog behaves better and enjoys time with you. Nail care helps your dog feel good inside and out. Tools You’ll Need Trimming your Cavalier’s nails needs the right tools. Using proper equipment makes the task safe and easy. These tools help avoid pain and injury for your dog. Prepare everything before you start for a smooth process. Types Of Nail Clippers There are three main types of nail clippers. Guillotine clippers have a small hole to place the nail. A blade then slices the tip quickly. Scissor clippers look like scissors but with strong blades. They work well for small to medium nails. Electric grinders file the nails down slowly. They are quiet and reduce the chance of cutting too short. Choose clippers that fit your dog’s nail size. Sharp blades make clean cuts. Dull tools can crush the nails and cause pain. Additional Supplies Keep some extra supplies close by. A styptic powder helps stop bleeding if you cut too deep. Nail files smooth rough edges after clipping. Treats reward your dog and make them calm. A towel or blanket can help hold your dog steady. Good lighting is important to see the nail clearly. Preparing Your Cavalier Preparing your Cavalier for nail trimming helps make the process smooth. Calm and comfort are key. A relaxed dog is easier to handle and less stressed. Taking time before trimming helps your dog feel safe and ready. Start by creating a quiet space. No loud noises or distractions. This keeps your Cavalier focused and calm. Gather all tools before you begin. This avoids interruptions and sudden movements. Calming Techniques Speak softly to your dog. Use a gentle voice to soothe them. Pet your Cavalier slowly to relax muscles. Offer small treats as rewards. This builds positive feelings about nail care. Try short massage sessions on paws. This gets your dog used to touch. Let them sniff the nail clippers first. Familiar scents reduce fear and anxiety. Proper Positioning Place your Cavalier on a stable surface. Use a non-slip mat for safety. Hold your dog gently but firmly. Support their body to prevent sudden moves. Lift one paw at a time. Keep your grip soft around the paw pads. Avoid squeezing too hard. Position the paw so you see the nails clearly. Credit: www.akc.org Step-by-step Nail Trimming Trimming your Cavalier’s nails keeps them healthy and comfortable. Regular nail care stops pain and prevents damage. The process can be simple with the right steps. Knowing how to trim safely helps you avoid hurting your dog. Identifying The Quick The quick is the pink part inside the nail. It has blood vessels and nerves. Cutting the quick causes pain and bleeding. Light-colored nails show the quick clearly. Dark nails need more care to find it. Look for a small dark spot or stop trimming if you see a white circle. Always trim little by little to avoid cutting the quick. Safe Cutting Methods Use sharp, clean nail clippers made for dogs. Hold your Cavalier’s paw gently but firmly. Trim small pieces of the nail at a time. Stop if the nail feels soft or you see the quick. File the edges after cutting to avoid sharp tips. Praise your dog during and after trimming to keep them calm. Have styptic powder ready to stop bleeding if you cut the quick. Aftercare Tips After trimming your Cavalier’s nails, proper care is very important. It helps keep your dog calm and prevents problems. Small steps after clipping can make a big difference. Take time to check your dog’s paws and nails. Watch for any signs of pain or injury. Keep your dog comfortable and relaxed during this time. Dealing With Bleeding Bleeding can happen if the nail is cut too short. Use a clean cloth to press on the nail gently. This will help stop the bleeding fast. Apply a little styptic powder or cornstarch to the nail tip. These help stop bleeding quickly. Avoid using strong chemicals or creams that may hurt your dog. Keep your dog still and calm during this process. Praise and soft words help reduce their stress. Rewarding Your Dog Give your Cavalier a small treat after nail trimming. This creates a positive link with the experience. Use treats your dog loves, like small pieces of meat or biscuits. Praise your dog with a gentle voice and petting. This builds trust and calmness. Repeat this after every nail trim session. Rewarding helps your dog feel safe and happy next time. It makes future nail trims easier for both of you. How Often To Trim Trimming your Cavalier’s nails is … Read more

Dehydrated Vegetable Dog Treats: Ultimate Healthy Snack Guide

Dehydrated Vegetable Dog Treats

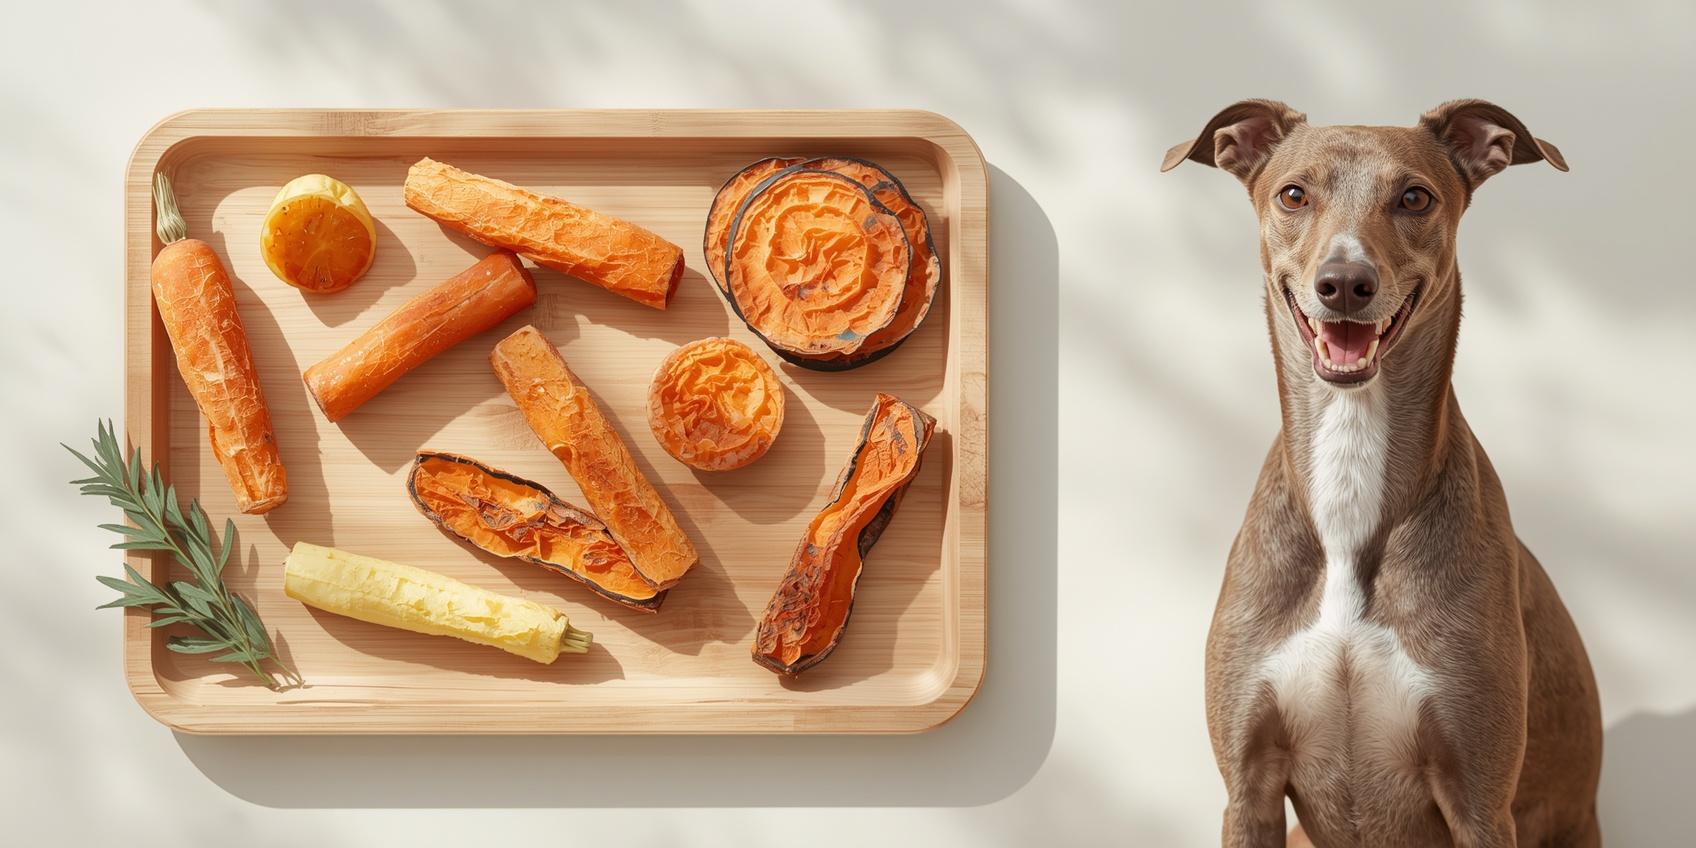
Are you looking for a healthy, tasty treat for your furry friend? Dehydrated vegetable dog treats might be just what your dog needs. These simple snacks are packed with nutrients and free from artificial additives. Imagine giving your dog something crunchy, delicious, and good for their body—all in one bite. Keep reading to discover why dehydrated vegetable treats can be a game-changer for your dog’s diet and how you can easily make or choose the best ones. Your dog will thank you! Credit: naturespetcuisine.com Benefits Of Dehydrated Treats Dehydrated vegetable dog treats offer many benefits for your pet. They keep the natural taste and nutrients of vegetables. These treats are a healthy snack option. Dogs enjoy the crunchy texture, making treat time fun and rewarding. Nutritional Value Dehydrated treats keep most vitamins and minerals intact. The low heat drying process preserves nutrients better than cooking. Vegetables provide fiber, which helps digestion. These treats give your dog natural energy without additives. Long Shelf Life Removing moisture stops bacteria and mold growth. This means treats last longer without spoiling. You can store them easily at room temperature. No need for preservatives or refrigeration. Natural Ingredients These treats contain only simple, whole vegetables. No artificial colors, flavors, or chemicals. They are safe and gentle on your dog’s stomach. Pure ingredients reduce allergy risks and keep pets healthy. Credit: vilapieneza.com.br Choosing Vegetables Choosing the right vegetables for dehydrated dog treats is very important. The vegetables must be healthy and safe for dogs. They should also keep their nutrients and flavor after drying. Picking fresh and suitable vegetables helps make treats tasty and good for your dog’s health. Safe Options For Dogs Carrots, green beans, and sweet potatoes are great choices. These vegetables are gentle on dogs’ stomachs. They provide vitamins and fiber dogs need. Cucumbers and zucchini also work well. They have high water content and low calories. These vegetables dry nicely without losing nutrients. Avoiding Toxic Vegetables Onions, garlic, and leeks are harmful to dogs. They can cause serious health problems. Avoid raw or cooked forms of these vegetables. Also, stay away from mushrooms found outside. Some wild mushrooms are poisonous. Always check the vegetable list before making treats. Organic Vs Conventional Organic vegetables have fewer pesticides and chemicals. This is safer for your dog’s health. Conventional vegetables may have residue from sprays. Washing well helps but does not remove all chemicals. Organic veggies often taste fresher. Choosing organic can improve the quality of your dog treats. Preparation Steps Preparing dehydrated vegetable dog treats takes a few simple steps. Each step helps keep the vegetables fresh and tasty. Proper preparation also keeps the treats safe for dogs. Follow these steps to make healthy snacks for your pet. Washing And Peeling Start by washing vegetables thoroughly under cold water. Dirt and pesticides must be removed completely. Use a vegetable brush for rough skins like carrots. Peel vegetables like potatoes and sweet potatoes to remove outer layers. Clean vegetables help ensure safe and tasty treats. Cutting Techniques Cut vegetables into uniform pieces for even drying. Small slices or thin strips work best. Avoid thick chunks that take longer to dry. Use a sharp knife for clean cuts. Consistent size helps the dehydrator work efficiently. Blanching Tips Blanch vegetables by boiling them briefly, then cooling in ice water. This step preserves color and texture. It also kills bacteria and stops enzymes that cause spoilage. Blanching time varies by vegetable type. Usually, 2 to 5 minutes is enough. Credit: firstfilbio.com Dehydration Methods Dehydration removes moisture from vegetables, making dog treats last longer. This process keeps nutrients and flavors intact. Different methods can be used to dehydrate vegetables. Each method has its own benefits and steps. Using A Food Dehydrator A food dehydrator is a popular tool for drying vegetables. It uses low heat and a fan to remove water evenly. This method is fast and keeps nutrients well. Simply slice vegetables thin and place them on trays. Set the temperature between 125°F and 135°F. Drying time varies from 6 to 12 hours. Check for crispness to know when it is done. Oven Drying Process The oven can also dry vegetables for dog treats. Preheat the oven to the lowest temperature, around 140°F. Spread thin slices on a baking sheet in a single layer. Keep the oven door slightly open for air flow. This helps moisture escape and speeds drying. Turn the slices every hour to dry evenly. It takes 4 to 8 hours depending on vegetable type. Air Drying Air drying is the simplest method but takes the longest time. Hang or lay thin vegetable slices in a warm, dry place. Avoid areas with high humidity or direct sunlight. This method can take several days to a week. Vegetables dry slowly but keep their shape well. It works best with thin, small pieces. Patience is key for this natural drying method. Storage And Serving Storing and serving dehydrated vegetable dog treats properly keeps them fresh and tasty. Good storage stops moisture and air from spoiling the treats. Serving the right amount helps your dog stay healthy and happy. Follow these tips for best results. Proper Storage Containers Use airtight containers to store dehydrated vegetable dog treats. Glass jars with tight lids work well. Plastic containers with seals also keep air out. Avoid leaving treats in open bags or boxes. Keep containers in a cool, dry place away from sunlight. Shelf Life Expectations Dehydrated vegetable treats usually last up to six months. Shelf life depends on storage conditions and moisture levels. Check treats for any signs of mold or smell changes. Toss any treat that looks or smells off. Proper containers can extend freshness and prevent spoilage. Serving Size Guidelines Offer treats as small rewards or snacks. Limit serving size based on your dog’s weight. For small dogs, one or two small pieces work well. Larger dogs can have a few more, but avoid overfeeding. Treats should not replace regular meals or daily nutrition. Troubleshooting Common Issues … Read more

Homemade Salmon Dog Treats: Easy Nutritious Recipe Dogs Adore

Homemade Salmon Dog Treats

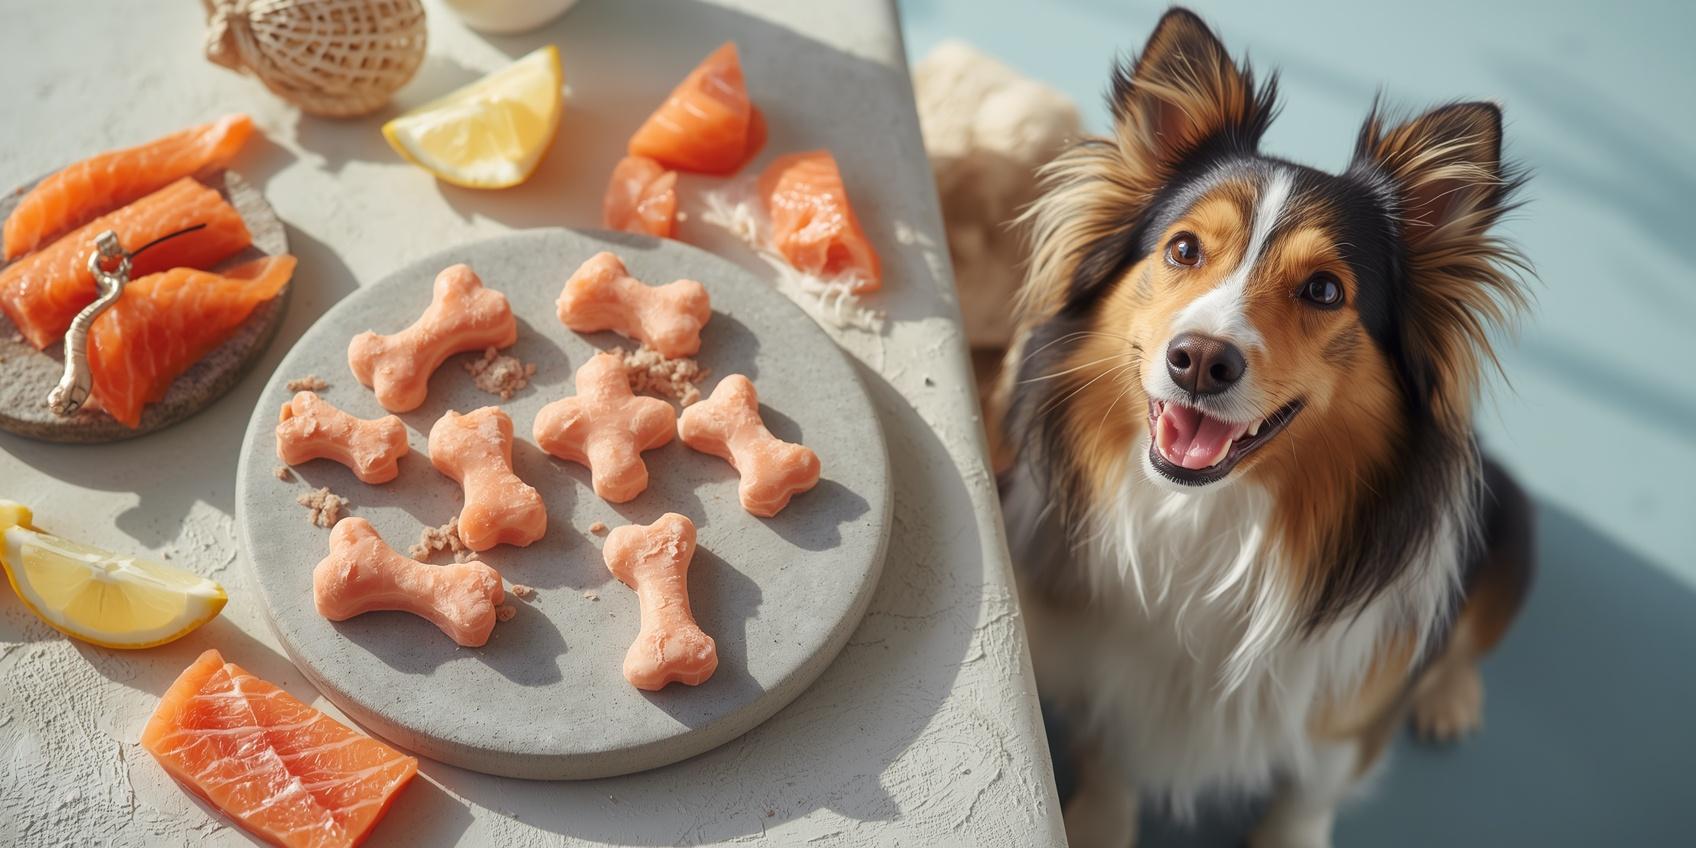
If you want to give your furry friend a tasty and healthy snack, homemade salmon dog treats are the perfect choice. Not only do these treats taste great, but they also pack a punch of nutrition that supports your dog’s skin, coat, and overall health. Imagine the joy on your dog’s face when you hand over a treat made with love and natural ingredients you can trust. Keep reading, and you’ll discover an easy recipe that turns simple ingredients into a delicious reward your dog will crave again and again. Benefits Of Salmon Treats Salmon treats offer many benefits for dogs. They provide important nutrients that support health and energy. Dogs enjoy the taste and you can feel good giving them a natural snack. Homemade salmon treats are free from artificial ingredients. They help maintain a happy and healthy pet. These treats support different parts of a dog’s body. Strong bones, shiny fur, and good digestion. Salmon is a great choice for a healthy snack. It is tasty and full of health benefits. Nutritional Value For Dogs Salmon is rich in protein. Protein helps build muscles and repair tissues. It contains vitamins like B12 and D. These vitamins support the nervous system and bones. Salmon also has minerals like zinc and selenium. These minerals boost the immune system and protect cells. Skin And Coat Health Salmon treats improve skin and coat health. They help reduce dryness and itching. The nutrients in salmon keep fur soft and shiny. Healthy skin means less scratching and fewer skin problems. Dogs look better and feel more comfortable. Omega-3 Fatty Acids Omega-3 fatty acids are strong fats found in salmon. They reduce inflammation and support the heart. These fats improve brain function and joint health. Omega-3s also help calm anxious dogs. They make salmon treats a smart choice for pet health. Choosing Ingredients Choosing the right ingredients is key for making healthy salmon dog treats. Good ingredients keep your dog safe and happy. They also make the treats tasty and nutritious. Fresh and safe ingredients help your dog enjoy every bite without any problems. Fresh Vs Canned Salmon Fresh salmon has more natural nutrients and better flavor. It is rich in omega-3 fatty acids, which help your dog’s skin and coat. Canned salmon is easier to store and use. Make sure it is packed in water, not oil or salt. Both types work well, but fresh salmon is best for health. Safe Additives And Flavors Use simple, natural flavors like parsley or carrot. These add taste without harm. Avoid artificial spices or seasonings. Small amounts of garlic or turmeric can be safe but check with your vet first. Add only dog-friendly herbs to keep treats healthy. Avoiding Harmful Ingredients Never use onion, chocolate, or raisins in dog treats. These are toxic and cause serious health problems. Stay away from sugar, salt, and preservatives. These can hurt your dog’s digestion and energy. Choose fresh, plain ingredients for safe homemade treats. Simple Salmon Treat Recipes Simple salmon treat recipes make healthy snacks for dogs easy. Salmon is rich in omega-3 fatty acids that support skin and coat health. These recipes use basic ingredients you can find at home. They are quick to prepare and safe for dogs. Try these easy ideas to make tasty salmon treats your dog will love. Each recipe focuses on wholesome ingredients and simple steps. Perfect for beginners and busy pet parents alike. Basic Salmon Biscuits Mix canned salmon with whole wheat flour and an egg. Add a little water to form a dough. Roll it out and cut into small shapes. Bake at 350°F for 20 minutes. Let cool before serving. These biscuits are crunchy and rich in protein. Salmon And Sweet Potato Bites Cook sweet potato until soft and mash it well. Stir in cooked salmon and a spoon of oat flour. Shape into small balls and place on a baking sheet. Bake at 375°F for 15 minutes. These bites are soft and full of nutrients. Perfect for dogs with sensitive teeth. Freeze-dried Salmon Snacks Slice fresh salmon into thin strips. Lay them flat on a baking tray lined with parchment. Dry in the oven at the lowest heat setting for 2-3 hours. Store in an airtight container. These snacks keep well and retain natural flavor. Great as a crunchy, high-protein treat. Credit: www.pookspantry.com Preparation Techniques Preparing homemade salmon dog treats needs care and simple steps. Good preparation ensures tasty and safe treats for your dog. Focus on cleaning, mixing, shaping, baking, and storing. Each step helps keep the treats fresh and healthy. Salmon Cleaning And Cooking Start by choosing fresh salmon. Remove all bones carefully to avoid harm. Rinse the fish with cold water to clean well. Pat dry with a paper towel. Cook salmon by baking or boiling until fully done. Avoid using salt or spices. Let it cool before mixing with other ingredients. Mixing And Shaping Treats Flake the cooked salmon into small pieces. Mix with dog-friendly ingredients like oats or sweet potato. Stir well to form a dough. Use your hands or a spoon to shape small treats. Make them bite-size for easy chewing. Place treats on a baking sheet lined with parchment paper. Baking And Storage Tips Bake treats at a low temperature for 20 to 30 minutes. Check often to avoid burning. Let treats cool completely before storing. Store in an airtight container to keep freshness. Keep them in the fridge for up to two weeks. Freeze for longer storage, up to three months. Feeding Guidelines Feeding your dog homemade salmon treats can be a healthy choice. Proper feeding keeps your dog safe and happy. It helps maintain good health and prevents overfeeding. Follow these simple guidelines to feed your dog the right way. Portion Sizes Start with small pieces for small dogs. Larger dogs can have bigger treats. A good rule is one or two small treats per day. Watch your dog’s weight and adjust portions if needed. Treats should never replace a … Read more

Chicken Dog Food Recipes: Easy Healthy Meals Your Pup Loves

Chicken Dog Food Recipes

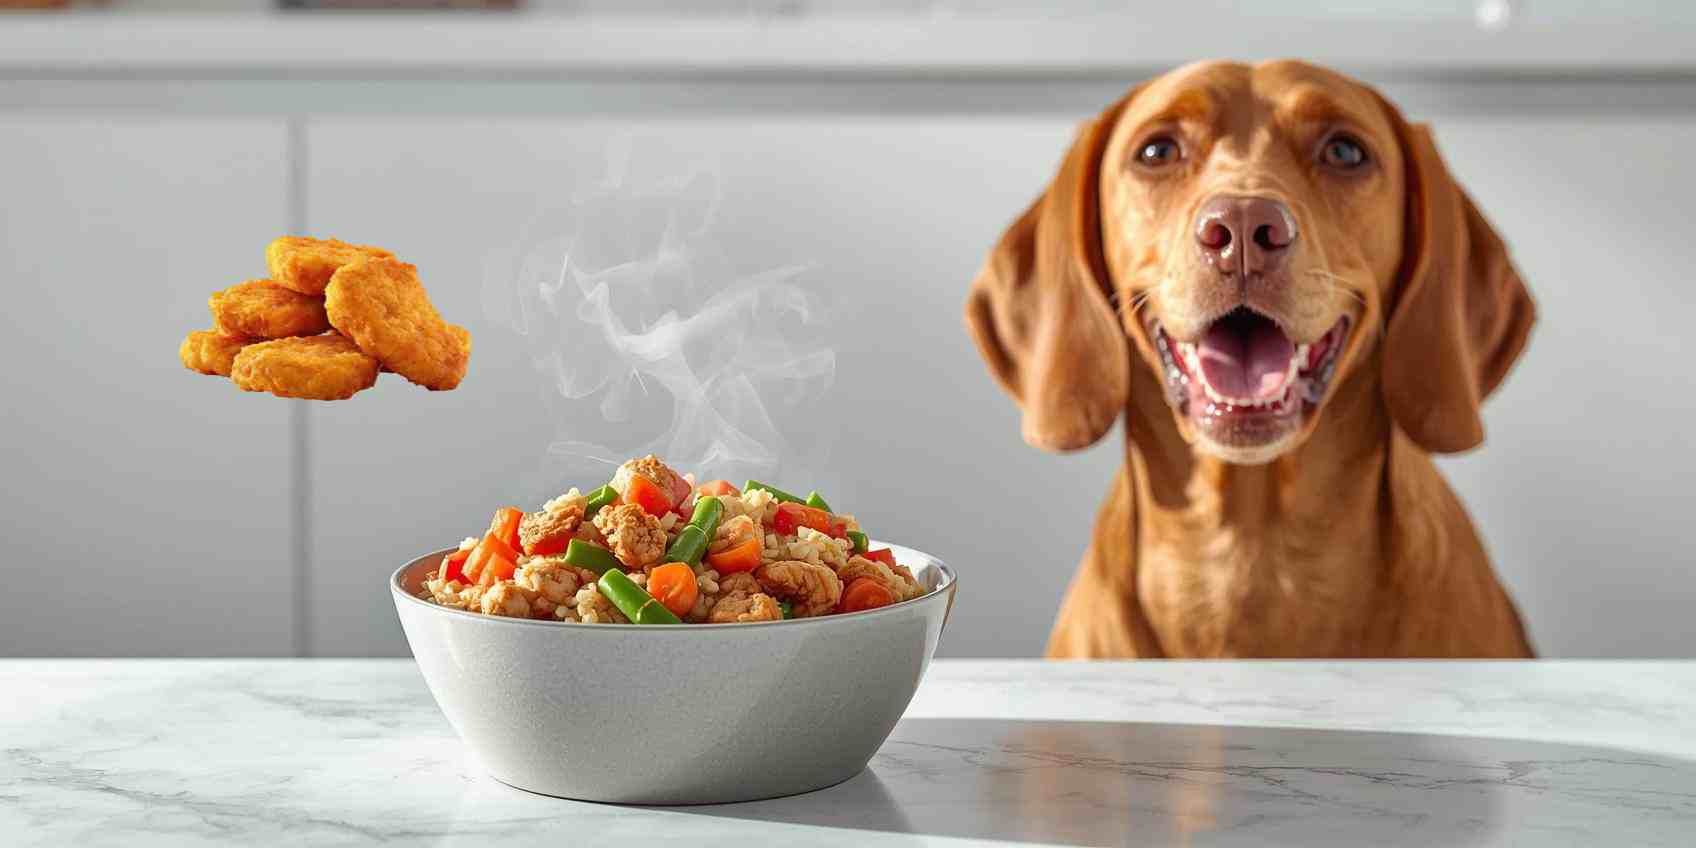
Are you looking for healthy and tasty meals your dog will love? Chicken dog food recipes could be the perfect solution. Using simple ingredients, you can make nutritious dishes that keep your furry friend happy and energetic. Imagine serving meals made with care, knowing exactly what goes into your dog’s bowl. Keep reading to discover easy recipes that will make mealtime exciting for your dog—and stress-free for you. Credit: inthevintagekitchen.com Benefits Of Chicken In Dog Food Chicken is a popular ingredient in dog food recipes. It offers many health benefits for dogs of all ages. Using chicken in homemade dog meals can improve your dog’s diet and overall well-being. Chicken provides essential nutrition. It supports muscle growth and energy. Many dog owners choose chicken for its easy digestibility and taste dogs enjoy. High Protein Content Chicken is rich in protein. Protein helps build strong muscles and tissues. Active dogs need protein to stay healthy and energetic. Chicken protein is easy for dogs to digest. It supports lean muscle maintenance and repair. Essential Nutrients Chicken contains important vitamins and minerals. It has B vitamins that boost metabolism and energy. Minerals like phosphorus and selenium support bone health and immunity. These nutrients keep dogs active and happy. Chicken offers balanced nutrition for daily needs. Allergy-friendly Option Chicken often suits dogs with food allergies. It is less likely to cause allergic reactions. Many dogs tolerate chicken better than other meats. Using chicken can reduce skin problems and digestive issues. It is a safe choice for sensitive dogs. Choosing The Right Chicken Choosing the right chicken is key to making healthy dog food recipes. The quality of chicken affects your dog’s health and taste of the meal. Fresh, safe, and nutritious chicken helps keep your dog strong and happy. Organic Vs. Conventional Organic chicken comes from birds raised without antibiotics or hormones. It often has fewer chemicals and pesticides. Conventional chicken may contain residues from medicines and faster growth methods. Organic chicken usually costs more but offers cleaner nutrition for dogs. Both types provide protein, but organic is safer for long-term health. Cuts Suitable For Dogs Choose chicken cuts with less fat and bones. Breast meat is lean and easy to digest. Thighs have more fat but taste richer. Avoid cooked bones as they can splinter and hurt your dog. Ground chicken is good for mixing with other ingredients. Always remove skin to reduce fat and avoid allergies. Avoiding Harmful Additives Check labels for added salt, spices, or preservatives. Dogs do not need seasonings that can upset their stomach. Avoid chicken with artificial colors or flavor enhancers. Plain, fresh chicken is best for homemade dog food. Additives may cause allergies or health problems over time. Basic Chicken Dog Food Recipes Basic chicken dog food recipes are easy to make at home. They use simple ingredients that are healthy for dogs. These recipes provide good protein and nutrients. Preparing homemade meals helps control what your dog eats. Each recipe is quick and uses fresh, natural foods. You do not need fancy tools or hard-to-find ingredients. These meals suit dogs with sensitive stomachs or food allergies. Try these simple recipes to keep your dog happy and strong. Simple Boiled Chicken Mix Boil chicken breasts until fully cooked. Let the chicken cool before chopping it into small pieces. Serve the chicken with a little water or broth. This recipe is gentle on the stomach and easy to digest. It works well for dogs recovering from illness. Chicken And Rice Blend Cook chicken breasts and plain white rice separately. Mix the chicken and rice in a 1:2 ratio. This blend offers protein and energy from carbs. It is a balanced meal that many dogs enjoy. Make sure the rice is soft and fully cooked. Chicken With Vegetables Boil chicken and steam dog-safe vegetables like carrots and green beans. Chop everything into small, bite-sized pieces. Mix chicken and vegetables for a colorful, nutritious meal. Vegetables add fiber and vitamins to your dog’s diet. Avoid onions, garlic, and other toxic vegetables. Credit: www.dogsnaturallymagazine.com Homemade Chicken Treats Homemade chicken treats are a great way to show love to your dog. These treats are healthy, simple, and fresh. You control the ingredients and avoid harmful additives. Dogs enjoy the natural flavor of chicken. Making treats at home saves money and keeps your dog happy. Chicken Jerky Chicken jerky is a tasty, chewy snack for dogs. Use thin slices of chicken breast. Bake at low heat until dry but not burnt. This method locks in flavor and keeps treats safe. Store in an airtight container for freshness. Jerky treats are perfect for training and rewards. Chicken Meatballs Chicken meatballs are soft and easy to eat. Mix ground chicken with a little rice or oats. Add grated carrot for extra nutrients. Form small balls and bake until cooked through. These meatballs are great for small or older dogs. Cool before serving to avoid burns. Frozen Chicken Bites Frozen chicken bites are cool and refreshing treats. Cut cooked chicken into small pieces. Freeze on a tray until solid. Serve as a cold snack in hot weather. Dogs love the texture and taste. Frozen bites help keep dogs hydrated and calm. Balancing Meals With Supplements Balancing meals with supplements is key for healthy chicken dog food recipes. Supplements fill nutrient gaps in homemade meals. They help dogs get all vitamins, minerals, and fats needed for energy and growth. Not all dog foods have enough nutrients. Adding the right supplements keeps your dog strong and active. It supports their immune system and keeps their coat shiny. Careful choices make meals complete and safe. Adding Vitamins And Minerals Vitamins and minerals are essential for your dog’s health. Calcium supports strong bones and teeth. Zinc helps the skin and coat stay healthy. Vitamin A promotes good vision and immune function. Use balanced supplements designed for dogs. Avoid giving human vitamins. Too much or too little can harm your pet. Consult your vet for correct amounts and types. Incorporating … Read more

Cavalier Breeders in Michigan: Ultimate Guide to Trusted Choices

Cavalier Breeders in Michigan

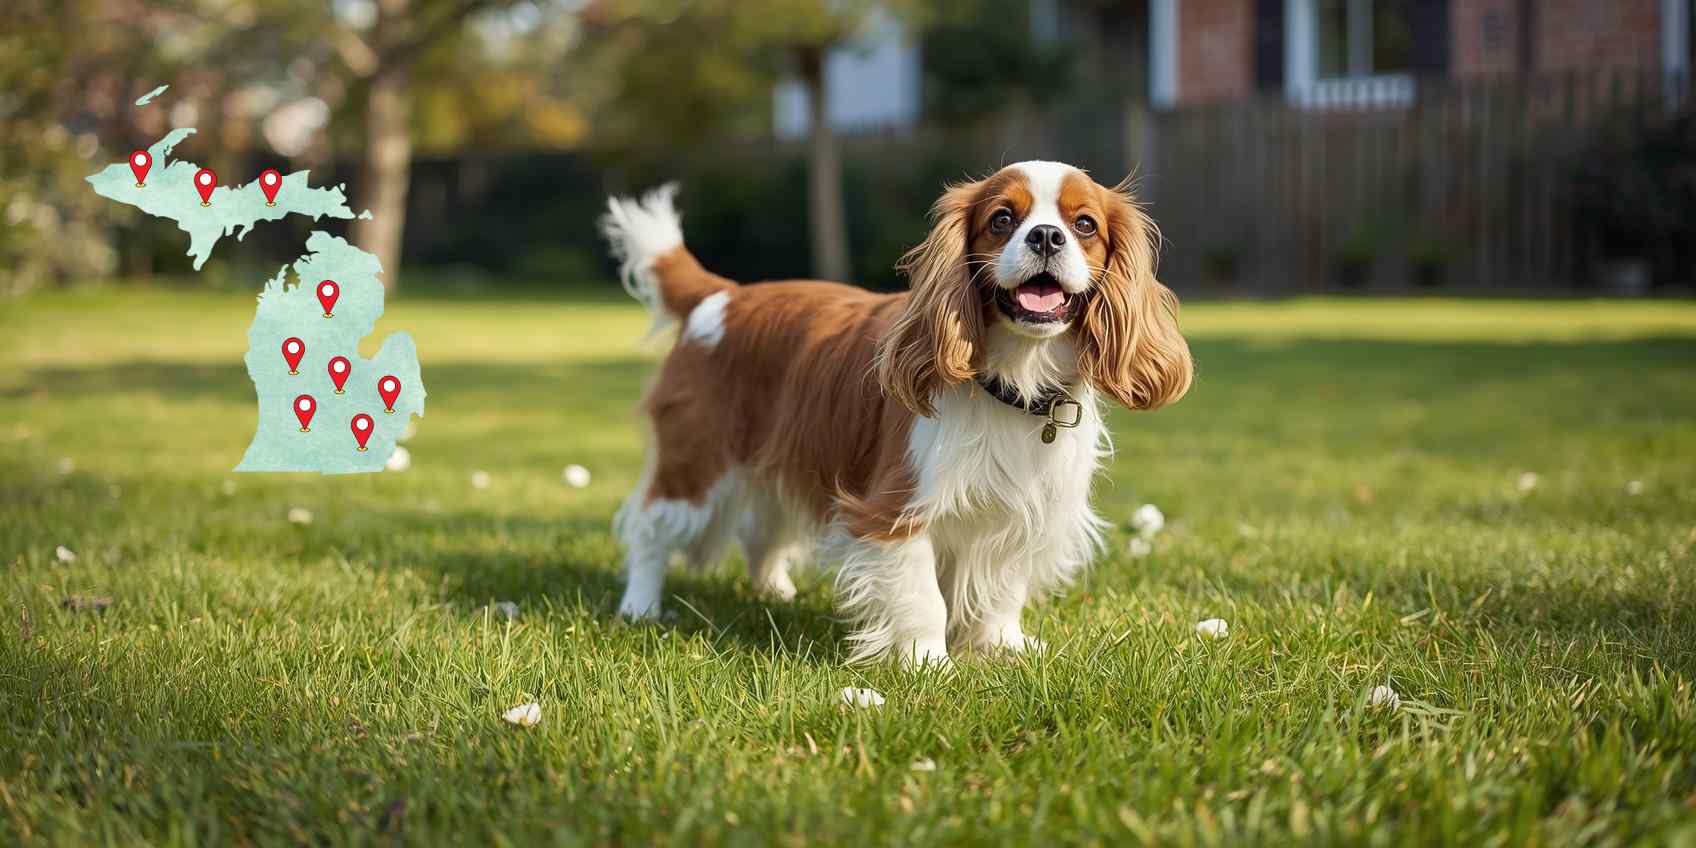
Are you looking for a loving Cavalier puppy to bring joy to your home? Finding the right breeder in Michigan can make all the difference in getting a healthy, happy dog that fits your family perfectly. You want a breeder who cares as much about your future pet as you do. This guide will help you discover trusted Cavalier breeders in Michigan, so you can feel confident and excited about welcoming your new furry friend. Keep reading to learn what to look for and how to choose the best breeder for your needs. History Of Cavalier Breeders In Michigan The story of Cavalier breeders in Michigan dates back several decades. Passionate dog lovers began importing these gentle dogs. They wanted to share the breed’s charm with local families. Small breeders started to appear in Michigan during the late 20th century. Their goal was to raise healthy and happy Cavaliers. They focused on good care and strong bloodlines. Over time, breeding practices improved. Breeders learned more about the breed’s needs. They worked hard to maintain the Cavalier’s friendly nature and beauty. Early Beginnings Of Cavalier Breeding In Michigan Michigan’s first Cavalier breeders were few but dedicated. They brought dogs from Europe and other U.S. states. These early dogs became the foundation for local breeding programs. These breeders shared advice and breeding tips. They formed small communities to support each other. Their efforts helped the breed grow in popularity. Growth And Development Of Breeding Programs Breeding programs expanded in the 1990s and 2000s. More people became interested in Cavaliers as pets. Breeders focused on health checks and temperament testing. They followed guidelines from national breed clubs. This ensured the dogs met breed standards. The breeding programs gained respect and trust. Modern Cavalier Breeding In Michigan Today, Michigan has many responsible Cavalier breeders. They use modern methods to protect the breed’s health. Their dogs often come with health guarantees. Breeders now educate owners about care and training. They keep the Cavalier’s gentle spirit alive. The breed continues to thrive in Michigan homes. Top Cavalier Breeders In Michigan Michigan has many Cavalier breeders who care deeply about their dogs. They work hard to raise healthy, happy puppies. Each breeder offers different qualities and services. Knowing what to expect helps find the right breeder for your new pet. This section highlights key points to check when choosing a Cavalier breeder in Michigan. Focus on their reputation, breeding methods, and health testing. These factors ensure you get a well-bred puppy. Reputation And Reviews Reputation shows how well breeders treat their dogs and customers. Good breeders have many positive reviews. Past buyers often share their experiences online. Honest feedback helps avoid poor choices. Trustworthy breeders are open and answer questions clearly. Breeding Practices Responsible breeders follow strict breeding standards. They select healthy parents with good temperaments. Puppies grow in clean, safe homes with proper care. Breeders socialize puppies early to help their behavior. Ethical breeding avoids overbreeding and unhealthy litters. Health And Genetic Testing Health tests protect puppies from inherited diseases. Top breeders check parents for heart, eye, and joint problems. Genetic screening helps spot potential risks. Puppies receive vaccinations and vet checkups before going home. This care ensures stronger, healthier dogs. Choosing The Right Breeder Choosing the right Cavalier breeder in Michigan is key to finding a healthy, happy puppy. A good breeder cares about the dogs’ health and temperament. They provide clear answers and show pride in their puppies. Taking time to choose carefully helps avoid future problems. Questions To Ask Ask about the puppy’s parents and health tests. Inquire if the breeder screens for heart and eye conditions. Find out about the puppy’s socialization and early care. Request information on vaccinations and deworming. Understand the breeder’s policy on returns or health guarantees. Visiting The Breeder Visit the breeder’s home or facility. Notice if the area is clean and safe. Observe how the breeder treats the dogs. Puppies should appear happy and active. Ask to meet the puppy’s parents. This shows the dog’s temperament and living conditions. Evaluating Puppy Conditions Check the puppy’s eyes, ears, and nose for cleanliness. The coat should be soft and shiny. Puppies should not be too thin or too fat. Watch the puppy walk to spot any limping. Healthy puppies are curious and playful. Avoid puppies who seem shy or sick. Credit: www.kingsleecavaliers.com Cavalier King Charles Spaniel Traits The Cavalier King Charles Spaniel is a beloved breed known for its charming traits. This dog combines beauty, warmth, and a friendly nature. Many families in Michigan choose this breed for its gentle personality and lovely looks. Understanding the traits of Cavalier King Charles Spaniels helps owners provide better care. This section covers their temperament, size, and health concerns. It offers useful insights for those interested in Cavalier breeders in Michigan. Temperament And Personality Cavaliers are friendly and love to be near people. They enjoy playing and cuddling. These dogs are patient with children and get along well with other pets. They rarely show aggression and are easy to train. Their calm and loving nature makes them great companions for all ages. Appearance And Size Cavaliers have a soft, silky coat with feathered ears and tail. Their colors include ruby, black and tan, Blenheim, and tricolor. These dogs are small, weighing 13 to 18 pounds. Their height ranges from 12 to 13 inches. Their expressive eyes and gentle face attract many dog lovers. Common Health Issues Cavaliers can face some health problems. Heart disease, especially mitral valve disease, is common. They may also have ear infections due to their long ears. Regular vet checkups help catch issues early. Maintaining a healthy diet and exercise keeps them fit and happy. Cost And Availability In Michigan Finding a Cavalier breeder in Michigan involves understanding costs and availability. Prices vary based on several factors like lineage, health, and breeder reputation. Availability changes depending on demand and season. Knowing what to expect helps in planning your purchase. It also prepares you for possible waiting times. … Read more

First Aid Emergency Care for Dogs: Essential Life-Saving Guide

First Aid Emergency Care for Dogs

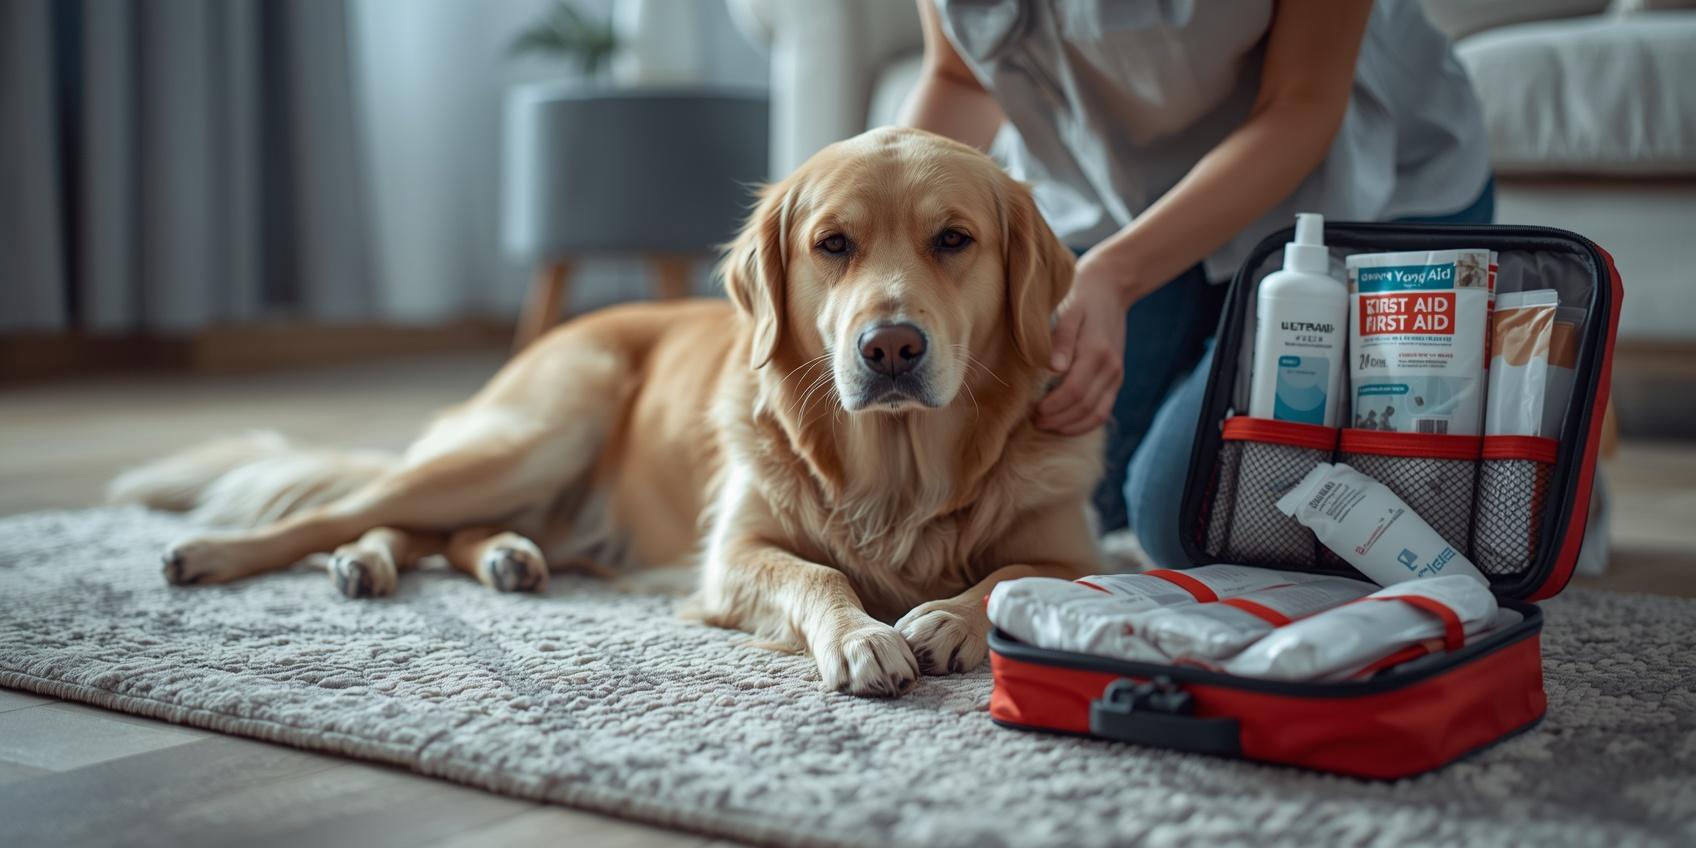
Imagine being the person everyone looks to in a sudden emergency. Your quick actions could make all the difference between life and death. First Aid Emergency Care for dogs isn’t just a skill for professionals—it’s something you can learn to protect your loved ones and yourself. Knowing what to do when seconds count gives you confidence and peace of mind. Keep reading, and you’ll discover simple, practical steps that could turn you into a real-life hero when it matters most. Basic First Aid Principles Basic first aid principles are vital in an emergency. They help save lives and reduce injuries. Knowing these steps builds confidence to act quickly and safely. Acting fast can make a big difference in the outcome. Assessing The Situation Start by looking at the scene carefully. Check for dangers like fire or traffic. Understand what happened and who is hurt. Look for signs of breathing and consciousness. Stay calm and focused to judge the next steps. Ensuring Personal Safety Your safety comes first. Do not rush into danger. Wear gloves if possible to avoid germs. Move the injured person only if they are in harm’s way. Protect yourself to help others effectively. Calling For Help Call emergency services quickly. Give clear details about the location. Describe the injury or illness briefly. Stay on the line until told to hang up. Help is on the way, so keep calm. Credit: www.icare-er.com Common Emergencies Common emergencies happen every day. Knowing how to act fast saves lives. First aid skills help you stay calm and provide help. This section covers common emergencies you might face. Bleeding And Wounds Bleeding happens when the skin breaks. It can be small or very heavy. Stop bleeding by pressing a clean cloth on the wound. Keep pressure until the bleeding slows or stops. Clean the wound gently with water. Cover it with a sterile bandage to prevent infection. Burns And Scalds Burns happen from heat, fire, or hot liquids. Cool the burn with running cold water for 10 minutes. Do not use ice or butter. Cover the burn with a clean, dry cloth. Seek medical help if the burn is large or very painful. Fractures And Sprains Fractures are broken bones. Sprains are stretched or torn ligaments. Avoid moving the injured part. Keep it still and supported. Use a splint or cushion if possible. Apply ice to reduce swelling. Get professional medical care quickly. Choking And Airway Obstruction Choking blocks breathing. The person may cough, gag, or cannot breathe. Encourage them to cough hard. If choking continues, give abdominal thrusts (Heimlich maneuver). Call for emergency help if breathing does not improve. Heart Attack And Stroke Heart attacks cause chest pain, shortness of breath, and sweating. Strokes cause sudden weakness, trouble speaking, or face drooping. Call emergency services immediately. Keep the person calm and resting. Do not give food or drink until help arrives. Cpr Techniques CPR techniques save lives in emergencies. Knowing how to perform CPR can help restart a person’s heart and breathing. This section explains the key steps of CPR. Each step plays a vital role in emergency care. Follow these simple instructions to act confidently in a crisis. Chest Compressions Place your hands in the center of the chest. Press hard and fast, about 2 inches deep. Aim for 100 to 120 compressions per minute. Let the chest rise fully between compressions. Keep your arms straight and use your body weight. Rescue Breaths After 30 compressions, give 2 rescue breaths. Tilt the head back and lift the chin. Pinch the nose shut and cover the mouth with yours. Blow air slowly until the chest rises. Each breath should last about 1 second. Using An Aed Turn on the AED as soon as it arrives. Follow the voice instructions carefully. Place the pads on the bare chest as shown. Let the AED analyze the heart rhythm. Deliver a shock only if the device advises it. Managing Shock Managing shock is critical in first aid emergency care. Shock happens when the body does not get enough blood flow. This can cause organs to fail quickly. Acting fast can save a life. Knowing the signs and how to respond helps a lot. Signs And Symptoms Look for pale, cool, and clammy skin. The person may feel weak or dizzy. Breathing might become fast and shallow. They could be confused or restless. A weak, rapid pulse is common. They might also feel thirsty or nauseous. Positioning The Patient Lay the person flat on their back. Raise their legs about 12 inches to help blood flow. Keep their head slightly tilted to the side. This helps keep the airway clear. Avoid moving them too much if there is a possible injury. Keeping The Patient Warm Cover the person with a blanket or coat. Keep their body temperature steady. Avoid direct heat sources like heaters or hot water. Warmth helps prevent the body from losing heat. Check often to make sure they stay comfortable. Handling Environmental Emergencies Environmental emergencies happen without warning. Knowing how to act fast saves lives. Each situation needs quick and calm care. This section explains key steps for common environmental emergencies. Heat Stroke And Heat Exhaustion Heat stroke is a serious condition. The body gets too hot and stops working well. Signs include confusion, headache, and no sweating. Move the person to shade or indoors. Cool them with wet cloths or a fan. Offer water if they are awake and alert. Call emergency help immediately. Heat exhaustion is less severe but still dangerous. Symptoms are heavy sweating, weakness, and nausea. Rest in a cool place. Drink water slowly. Avoid caffeine and alcohol. Watch for worsening symptoms. Hypothermia Hypothermia happens when the body loses heat fast. The skin feels cold and pale. Shivering may stop as it gets worse. Move the person to a warm place. Remove wet clothes carefully. Cover with dry blankets or clothes. Give warm drinks if conscious. Avoid direct heat like hot water. Seek medical help quickly. Poisoning … Read more

Homemade Ginger Dog Treats: Easy Recipe for Digestive Health

Homemade Ginger Dog Treats

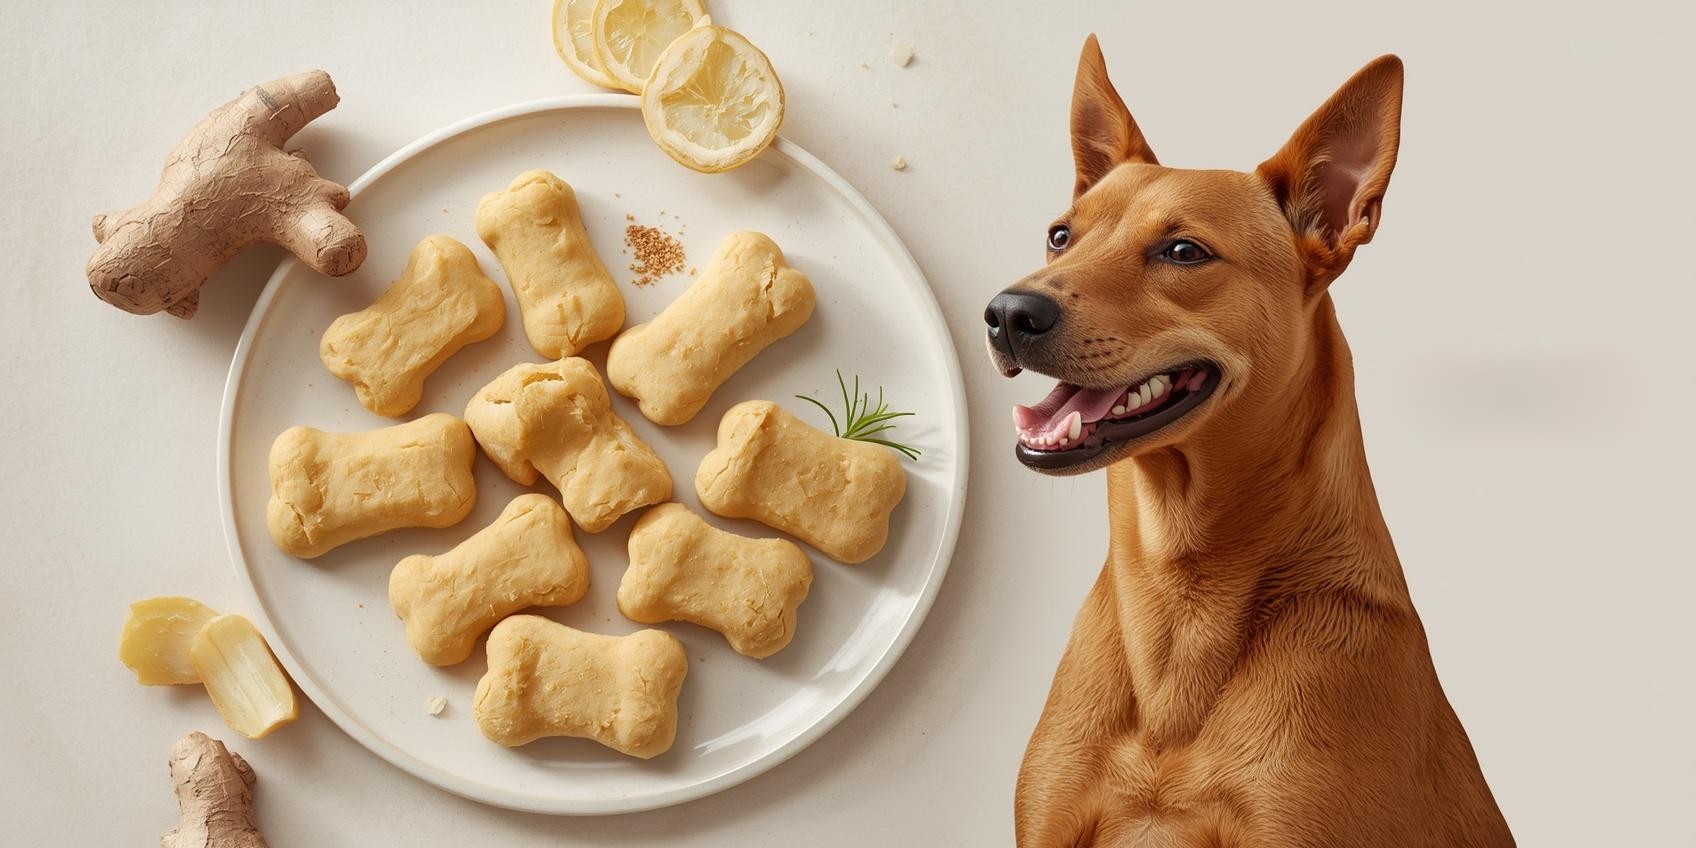
If you love spoiling your furry friend, homemade ginger dog treats are a tasty and healthy way to do it. Imagine giving your dog a snack that not only tastes great but also helps with digestion and soothes their tummy. You don’t need fancy ingredients or complicated steps to make these treats at home. Keep reading, and you’ll discover how easy it is to whip up a batch that your dog will eagerly wag their tail for every time. Your pup deserves the best, and these ginger treats might just become their new favorite! Credit: simplysharonandteddy.com Benefits Of Ginger For Dogs Ginger is a popular root that many dog owners use in homemade treats. It offers several health benefits that support a dog’s well-being. Including ginger in dog snacks can improve their daily comfort and energy. Many dogs enjoy the mild spicy taste of ginger. This natural ingredient can help maintain their health in different ways. Health Advantages Ginger contains important vitamins and minerals. These nutrients help boost a dog’s immune system. A stronger immune system means fewer illnesses and better overall health. Ginger also has antioxidants that fight harmful cells in the body. Digestive Support Ginger helps calm upset stomachs in dogs. It reduces nausea and motion sickness during travel. This root also improves digestion by easing gas and bloating. Dogs with sensitive stomachs can benefit from ginger treats. Anti-inflammatory Properties Ginger is known for reducing inflammation in the body. It can help dogs with arthritis or joint pain feel better. This natural anti-inflammatory reduces swelling and improves movement. Regular small amounts of ginger can support joint health. Credit: simplysharonandteddy.com Essential Ingredients Homemade ginger dog treats need the right ingredients for taste and health. Choosing the right items makes treats safe and tasty for your dog. Ginger adds a unique flavor and helps with digestion. Other ingredients keep the treats fresh and good for your pet. Fresh Vs. Ground Ginger Fresh ginger has a strong, natural taste. It also contains more nutrients that help your dog. Ground ginger is easier to measure and store. Both types work well, but fresh ginger gives a brighter flavor. Use only small amounts to avoid stomach upset. Dog-safe Additions Oats and whole wheat flour add fiber and make treats chewy. Peanut butter provides healthy fats and protein. Plain pumpkin is good for digestion and moisture. Small amounts of honey can sweeten naturally. Always choose unsalted and unsweetened options to keep treats safe. Avoiding Harmful Ingredients Never use chocolate, raisins, or onions in dog treats. These foods are toxic to dogs and cause illness. Avoid artificial sweeteners like xylitol; they are deadly to dogs. Skip salt and sugar to keep treats healthy. Stick to natural and safe ingredients for your pet’s well-being. Step-by-step Recipe Making homemade ginger dog treats is simple and fun. Follow these easy steps to create tasty snacks your dog will love. Each step guides you from mixing ingredients to baking perfect treats. Use fresh ginger and healthy ingredients to keep the treats natural. Let’s start with preparing the dough. Preparing The Dough First, gather all ingredients: whole wheat flour, fresh ginger, peanut butter, and a little water. Mix dry ingredients in a large bowl. Add peanut butter and water slowly. Stir until the dough becomes firm but soft enough to roll. If the dough is sticky, sprinkle a little flour. Chill the dough in the fridge for 15 minutes. This helps it become easier to handle. Shaping The Treats Lightly flour a clean surface and roll out the dough. Aim for about 1/4 inch thickness. Use cookie cutters or a knife to cut shapes. Bone shapes and circles work well. Place the cut dough on a baking sheet lined with parchment paper. Leave space between each treat so they do not stick together. Baking Tips Preheat the oven to 350°F (175°C). Bake treats for 15 to 20 minutes or until golden brown. Watch closely near the end to avoid burning. Let treats cool completely before giving to your dog. Store in an airtight container to keep fresh longer. Credit: pawsomerecipes.com Storage And Shelf Life Storing homemade ginger dog treats properly keeps them fresh and tasty longer. Good storage stops moisture and air from spoiling the treats. It also helps keep the ginger’s natural flavor strong. Knowing how to store and when to toss old treats protects your dog’s health. Proper Storage Methods Keep treats in an airtight container at room temperature. A glass jar or plastic container with a tight lid works well. Store in a cool, dry place away from sunlight. Avoid warm areas like near ovens or heaters. Proper storage keeps treats crunchy and fresh for up to two weeks. Freezing Treats Freeze extra treats to extend shelf life up to three months. Wrap treats in plastic wrap or use freezer bags. Label the bags with the date to track freshness. Thaw treats at room temperature before giving them to your dog. Freezing helps keep the ginger flavor and texture intact. Signs Of Spoilage Check treats before serving to avoid spoiled snacks. Mold or unusual spots mean throw the treats away. A sour or off smell shows the treats have gone bad. Soft or crumbly texture can also signal spoilage. Always give fresh, safe treats to your dog. Customizing Flavors Customizing flavors in homemade ginger dog treats makes snack time exciting. It lets you create unique tastes your dog will love. Simple ingredients can change the treat’s flavor and add health benefits. This section shows easy ways to tailor treats with safe, tasty additions. Adding Herbs Fresh or dried herbs add flavor and nutrition to treats. Parsley helps freshen breath and supports digestion. Rosemary offers antioxidants and a pleasant taste. Use small amounts to avoid strong flavors. Herbs also add natural color and aroma to treats. Incorporating Meats Cooked meats give treats a rich, savory flavor dogs enjoy. Chicken, turkey, and beef are great options. Make sure meat is plain, without spices or sauces. Finely chop or … Read more

Gluten Free Dog Treats: Ultimate Guide to Healthy Safe Choices

Gluten Free Dog Treats

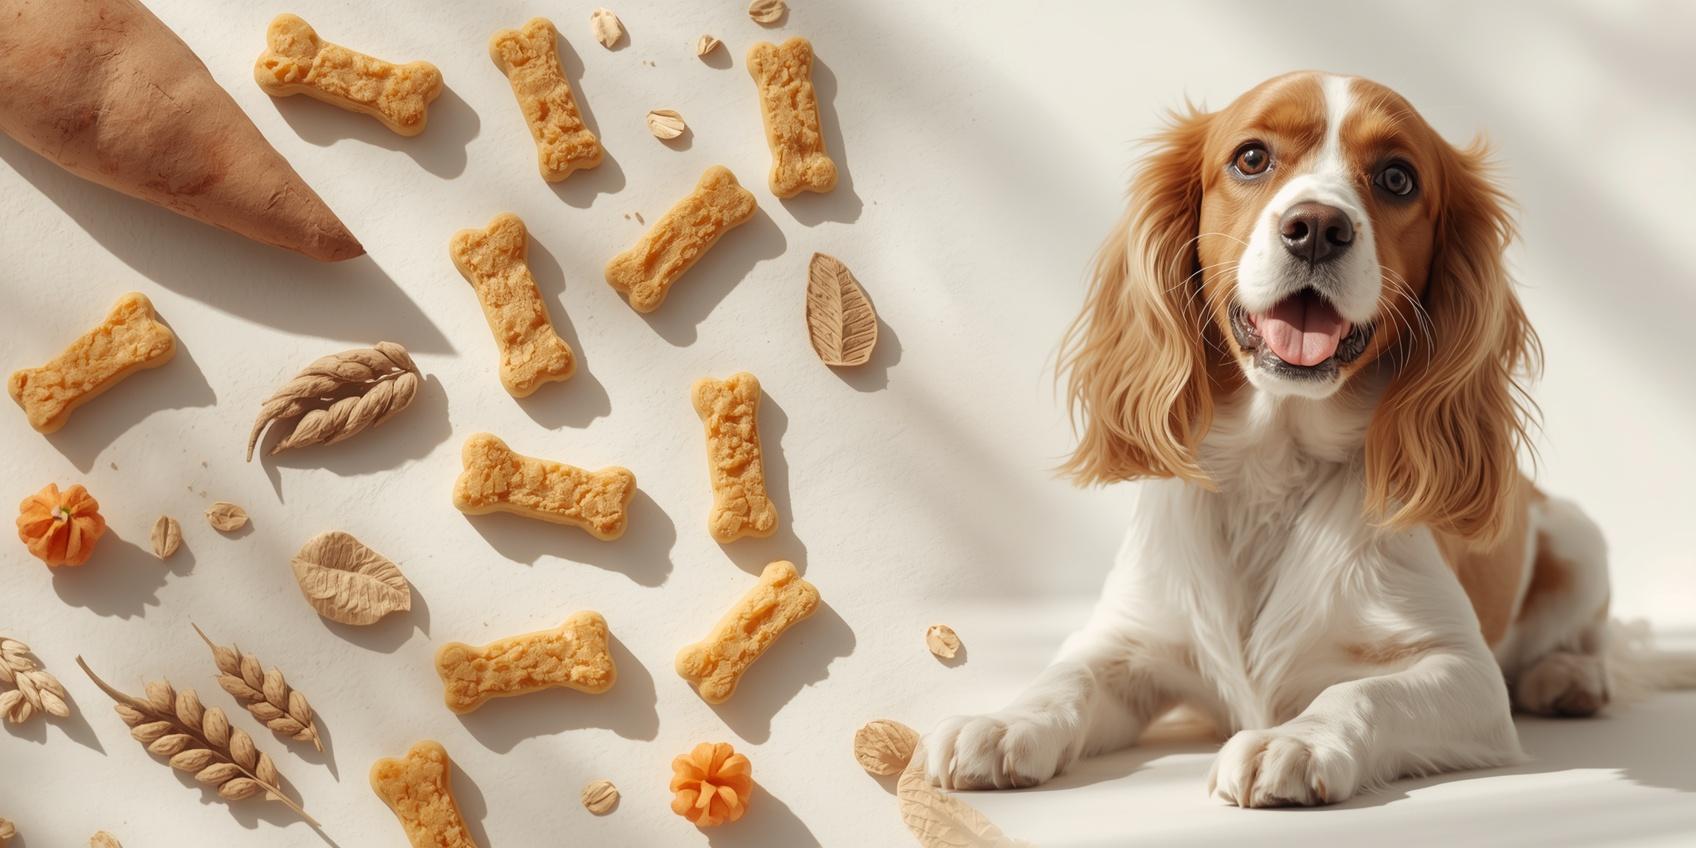
If you care about your dog’s health, you want to make sure every treat you give is safe and nutritious. But what if your furry friend has a gluten sensitivity or allergy? Finding the right snacks can feel tricky and confusing. That’s where gluten free dog treats come in—they can help keep your dog happy without upsetting their stomach. You’ll discover why gluten free treats might be the best choice for your pet and how to pick the tastiest, healthiest options. Keep reading to learn how to make your dog’s snack time both safe and delicious! Credit: divadogbakery.com Benefits Of Gluten Free Treats Gluten free dog treats offer several important benefits for your pet. These treats support better health and comfort. Many dogs face gluten-related issues that can affect their overall well-being. Choosing gluten free treats helps avoid common problems linked to gluten. Dogs with sensitivities or allergies often feel better after switching. These treats provide a safer and gentler option for dogs’ diets. Health Advantages For Dogs Gluten free treats reduce the risk of digestive problems. Dogs may experience less bloating, gas, or diarrhea. These treats support healthy digestion and nutrient absorption. They can also improve energy levels and coat health. Dogs feel more active and happier with gluten free snacks. Common Allergies And Sensitivities Many dogs have allergies to wheat, barley, or rye. These ingredients contain gluten and can cause itching or skin rashes. Gluten free treats avoid these triggers and soothe irritated skin. They help reduce allergic reactions and discomfort. Sensitive dogs benefit from fewer symptoms and better health. Ingredients To Use Choosing the right ingredients is key for making healthy gluten free dog treats. The ingredients must be safe and easy to digest. They should provide good nutrition and taste. Using natural and simple ingredients helps keep your dog happy and healthy. Gluten Free Grains And Flours Rice flour is a common gluten free choice. It is gentle on dogs’ stomachs. Oat flour is another good option. It adds fiber and nutrients. Coconut flour has healthy fats and a nice flavor. Almond flour offers protein and vitamin E. These flours create a good base for treats without gluten. Natural Flavor Enhancers Peanut butter adds taste and protein. Choose natural, unsweetened versions. Pumpkin puree is tasty and helps digestion. Sweet potatoes give sweetness and fiber. Fresh herbs like parsley can freshen breath. Plain yogurt adds creaminess and probiotics. These ingredients make treats more appealing to dogs. Safe Additives And Supplements Chia seeds provide omega-3 fatty acids and fiber. Flaxseeds improve coat health. A pinch of turmeric can reduce inflammation. Vitamin E supports skin and immune health. Avoid artificial colors, flavors, and preservatives. These safe additives boost the health benefits of your treats. Homemade Recipes Making gluten free dog treats at home is fun and healthy. You control every ingredient. This helps keep your dog safe and happy. Homemade treats often taste better to dogs. Plus, they avoid hidden gluten found in some store-bought snacks. Simple recipes use few ingredients. They save time and effort. Baking offers more variety and texture. Both methods allow you to add favorite flavors. Let’s explore easy recipes and helpful tips. Simple No-bake Treats No-bake treats are quick to prepare. Mix peanut butter, oats, and mashed banana. Shape into small balls or flat discs. Chill in the fridge for an hour. These treats stay fresh for several days. Perfect for busy days or last-minute snacks. Baked Treat Options Baked treats last longer and have a crunchy texture. Use gluten free flour like rice or almond flour. Add eggs, pumpkin puree, and cinnamon for flavor. Roll dough and cut into fun shapes. Bake at 350°F for 15-20 minutes. Let cool completely before serving. Tips For Customization Change ingredients based on your dog’s taste and needs. Swap pumpkin for sweet potato or apple sauce. Add a teaspoon of coconut oil for a shiny coat. Use parsley to freshen breath. Avoid harmful ingredients like chocolate or onion powder. Always check with your vet before new foods. Store-bought Options Choosing gluten free dog treats from the store can be easy and safe for your pet. Many brands now offer tasty treats without gluten. These treats suit dogs with allergies or sensitive stomachs. Store-bought options save time and ensure consistent quality. You can find treats made from natural ingredients and free from harmful additives. This section helps you pick the best gluten free treats available. Top Brands To Consider Several trusted brands specialize in gluten free dog treats. Blue Buffalo offers grain-free recipes using real meat and vegetables. Natural Balance has options with simple ingredients and no gluten. Merrick makes treats with limited ingredients, good for sensitive dogs. Zuke’s provides small, soft treats that are gluten free and healthy. These brands focus on quality and safety for your dog’s diet. Reading Labels Effectively Check labels carefully to avoid gluten. Look for terms like “gluten free” or “grain free” on packaging. Watch out for wheat, barley, rye, or oats as hidden sources of gluten. Ingredients should be simple and easy to understand. Avoid treats with artificial colors, flavors, or preservatives. Always confirm the treat is made in a gluten free facility. Reading labels helps protect your dog from gluten reactions. Potential Risks And Precautions Choosing gluten free dog treats can help some dogs with allergies or sensitivities. Still, there are risks and precautions to consider. Understanding these helps keep your dog safe and healthy. Gluten free does not always mean allergen-free. Some treats may contain other ingredients that cause reactions. Careful selection and observation are important steps. Cross-contamination Concerns Cross-contamination happens when gluten touches gluten free treats. This can occur during manufacturing or packaging. Even small amounts of gluten can trigger issues for sensitive dogs. Buy treats from brands that clearly label gluten free. Look for certifications or testing claims. Store gluten free treats separately from regular ones at home. Monitoring Your Dog’s Reaction Watch your dog closely after giving new treats. Signs of problems include itching, diarrhea, … Read more